
Axnhost.com

Updates

Auto Added by WPeMatico

Your Email Links Automatically Show Up In Google Analytics

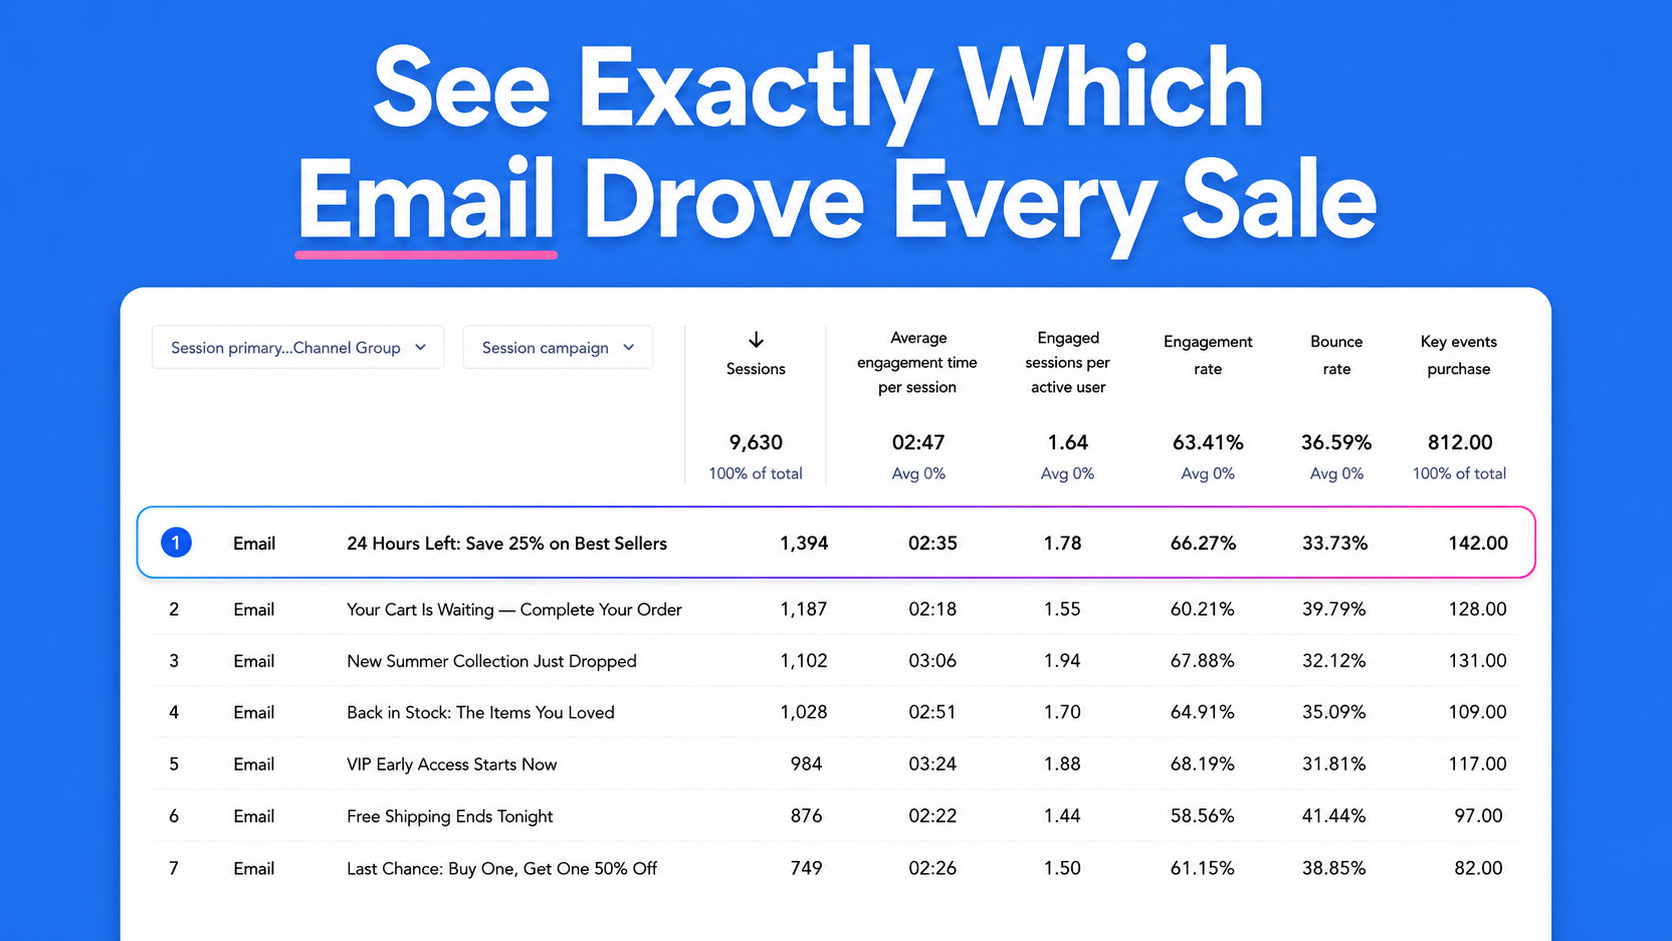
See exactly which email drove every sale

Send an email, get a click, make a sale. Now you can trace that sale back to the exact subject line that started it. AWeber automatically tags every link in every email with UTM parameters before your email goes out. Open Google Analytics and the data’s already waiting for you.

No manual setup.

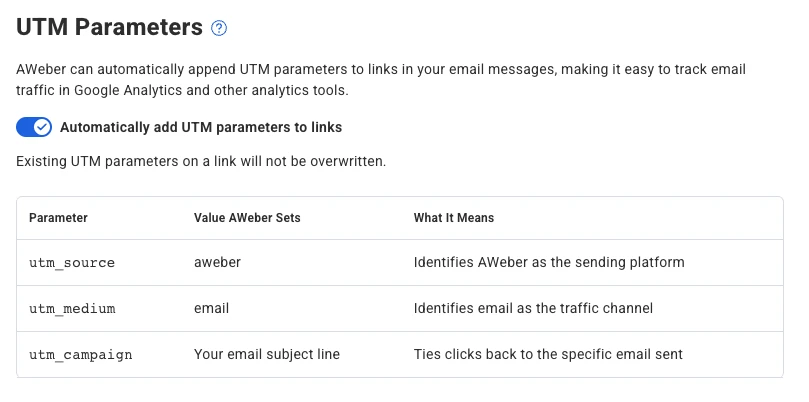
AWeber adds three UTM parameters to every link at send time.

  • utm_source is set to aweber
  • utm_medium is set to email
  • utm_campaign is set to your email’s subject line

Each email gets its own campaign label in Google Analytics, named after its subject line. You can compare performance across sends without touching a single URL.

Already adding your own parameters? Yours stay put

AWeber detects existing UTM parameters and leaves them alone. If you’ve already tagged a link with your own campaign values, AWeber won’t overwrite them. Your custom tracking stays intact.

See which emails actually move people to buy

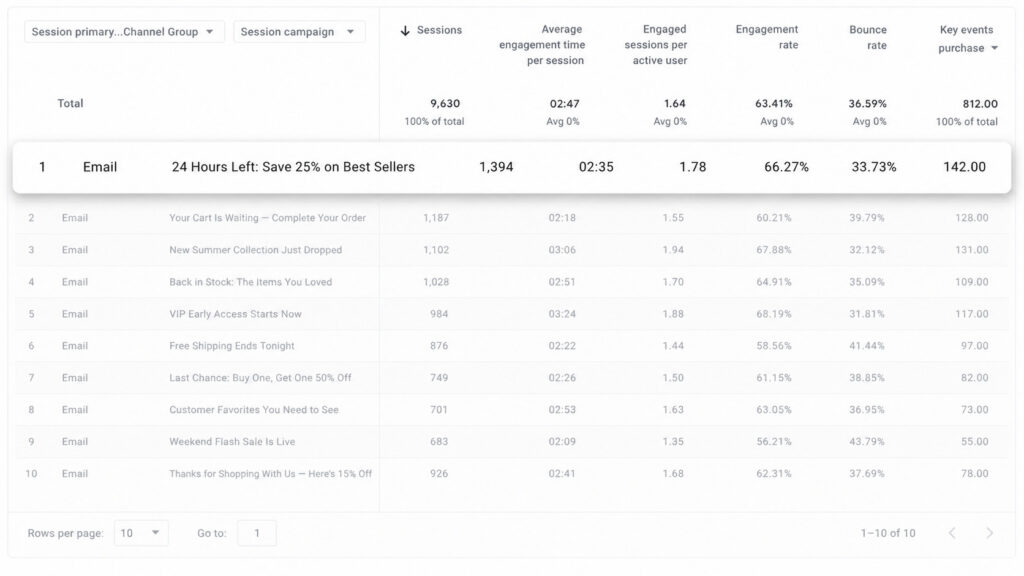
In Google Analytics, go to Acquisition > Traffic acquisition and filter by source/medium (aweber / email). Every email shows up as its own campaign.

Pull your last several sends. You’ll see which messages drove traffic, which drove conversions, and which fell flat.

Image from Google Analytics showing tracking from utm parameters

Turn it on or off from your list settings

This feature is on by default for every AWeber account. To adjust it for a specific list:

  1. Log in and go to your List Settings page
  2. Find the UTM Tracking toggle
  3. Flip it on or off

The setting takes effect on your next send.

Screenshot of list settings page in AWeber showing where to toggle utm tracking on and off

The post Your Email Links Automatically Show Up In Google Analytics appeared first on AWeber.

Your Email Links Automatically Show Up In Google Analytics Read More »

Enhance Your Images in the AI Builder

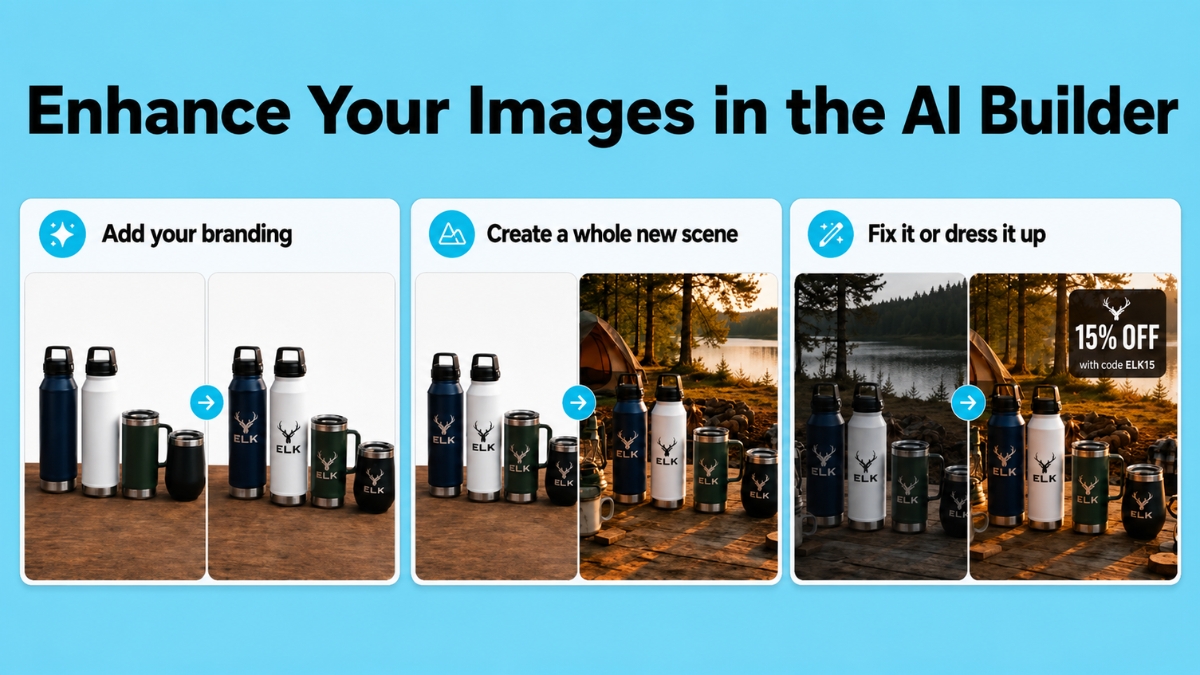
Enhance your images in the AI Builder

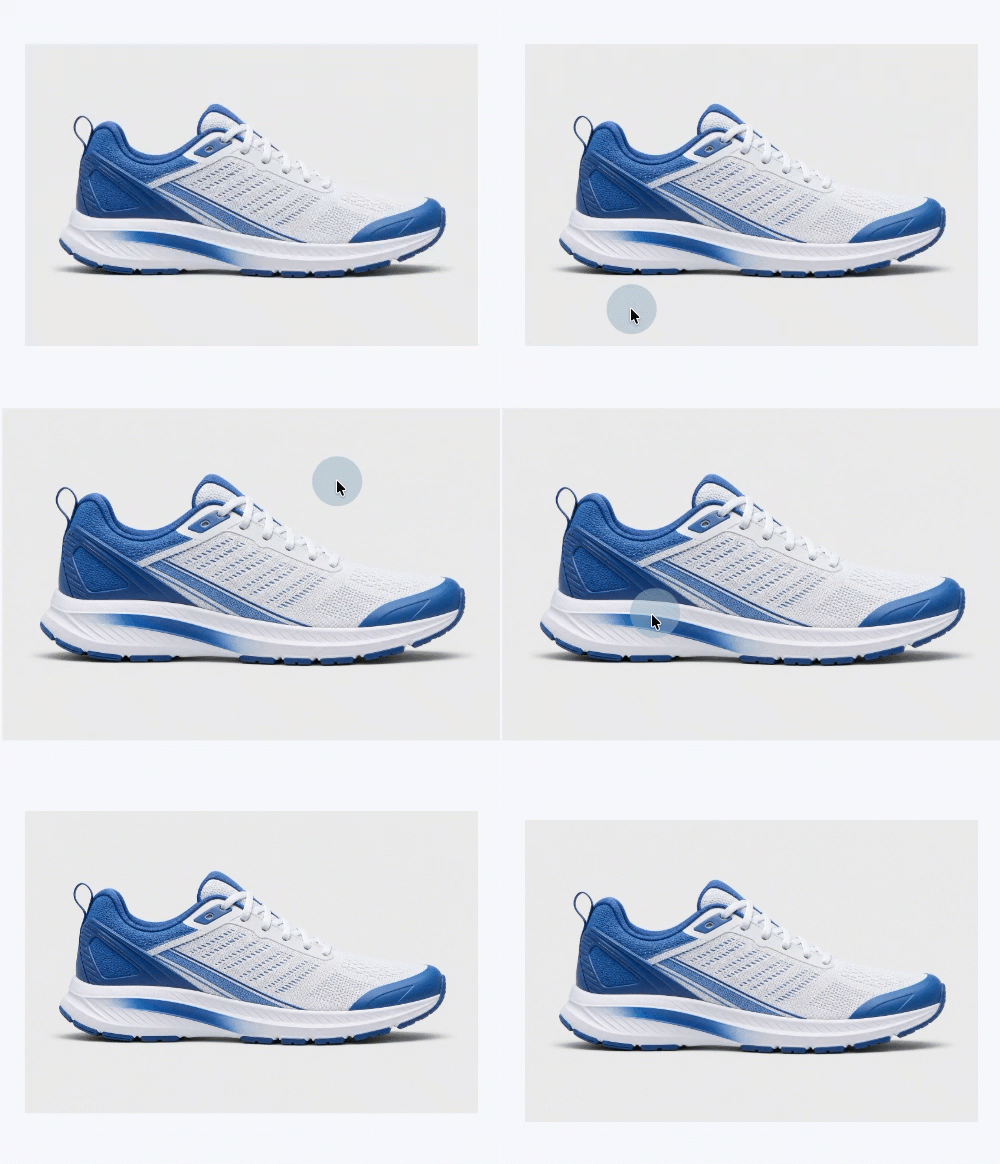
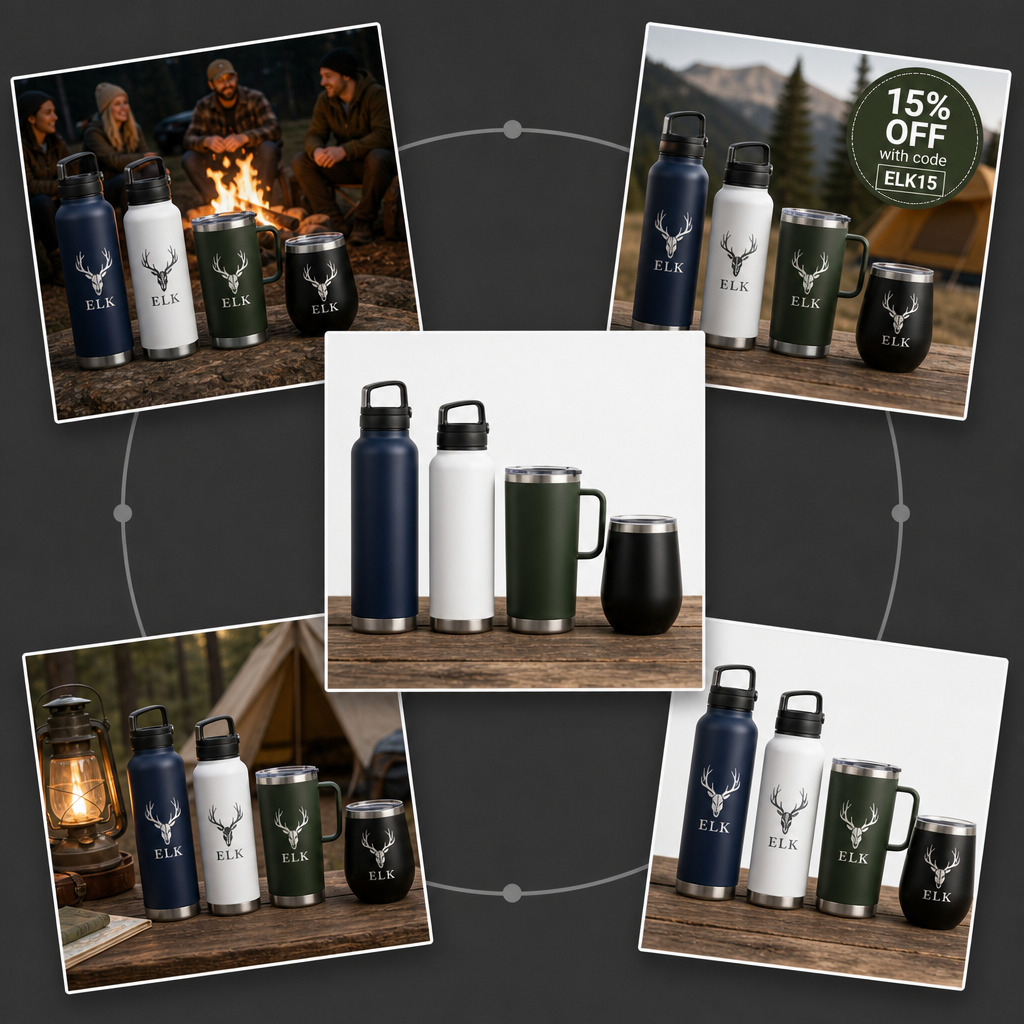
A single product shot can now become whatever the moment calls for. A different scene, your branding, a fixed flaw, a promotional overlay.

AWeber’s AI image editing is now live in the AI Signup Form Builder, and it’s coming soon to the AI Landing Page Builder and AI Email Builder.

Improve any image with a text prompt

Add your branding

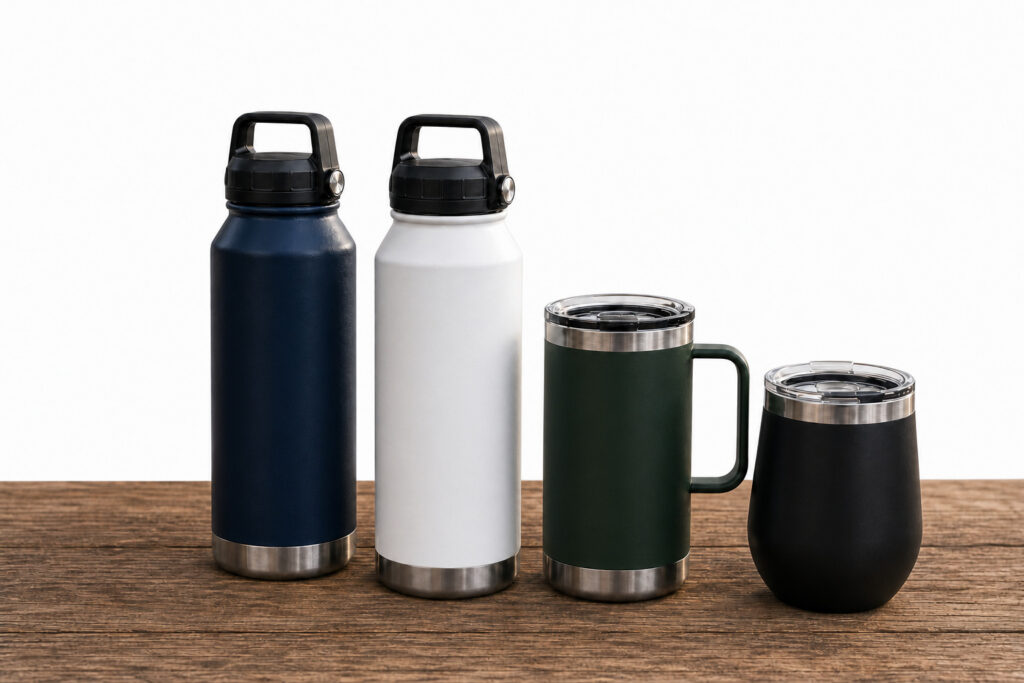
Stock photos and basic product shots rarely come with a logo already on them. Describe what you want added, and now they do.

Photo of tumblers

Photo of branded Tumblers

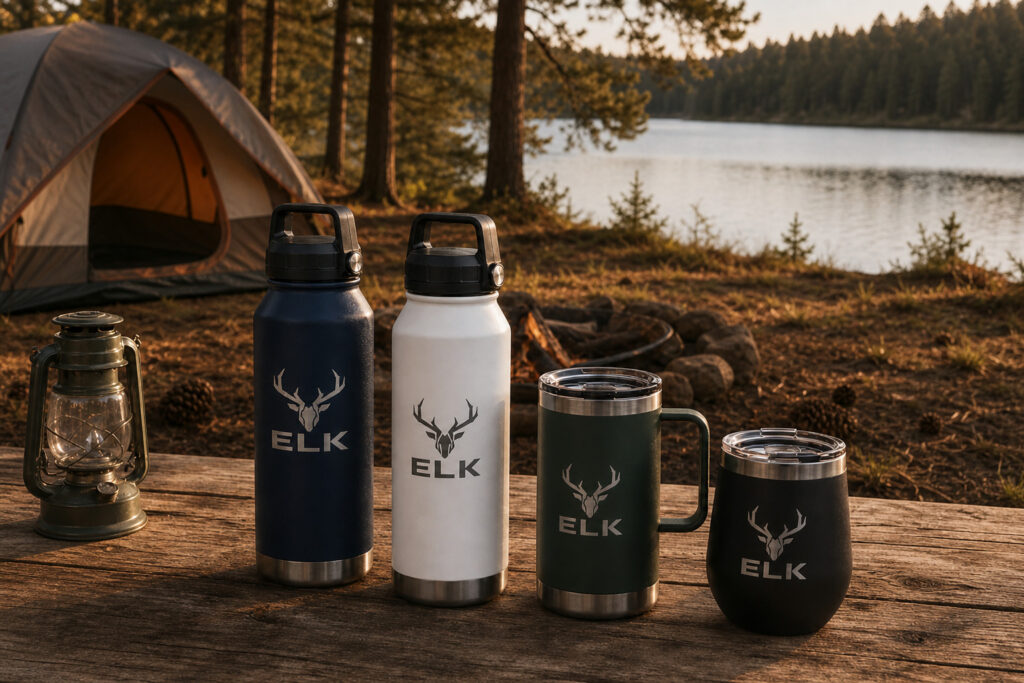
Put your product in a scene it was never photographed in

Take a plain studio shot and place it somewhere that sells the lifestyle: a campsite, a kitchen counter, a desk setup. Describe the scene, and the same product appears in it.

Photo of branded Tumblers

Photo of branded tumblers on scenic background

Fix what’s wrong with the photo

Bad lighting, a busy background, an awkward crop. Instead of redoing the shoot, describe the fix.

Photo of branded tumblers on scenic background

Photo of branded tumblers on scenic background

Add a text overlay that looks designed

Drop in a promo code, a callout, or a headline styled to match the scene, not just placed on top of it.

Photo of branded tumblers on scenic background

Photo of branded tumblers on scenic background with text overlay

Each edit saves as its own file, and the original stays in the library too. So testing a new direction never means starting over if it doesn’t work.

How it works

1. Add an image to the AI Signup Form Builder

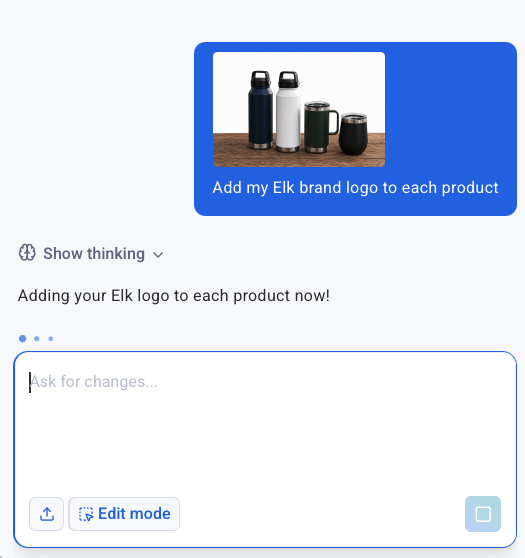
2. Describe the change you want

The more specific the prompt, the better the result.

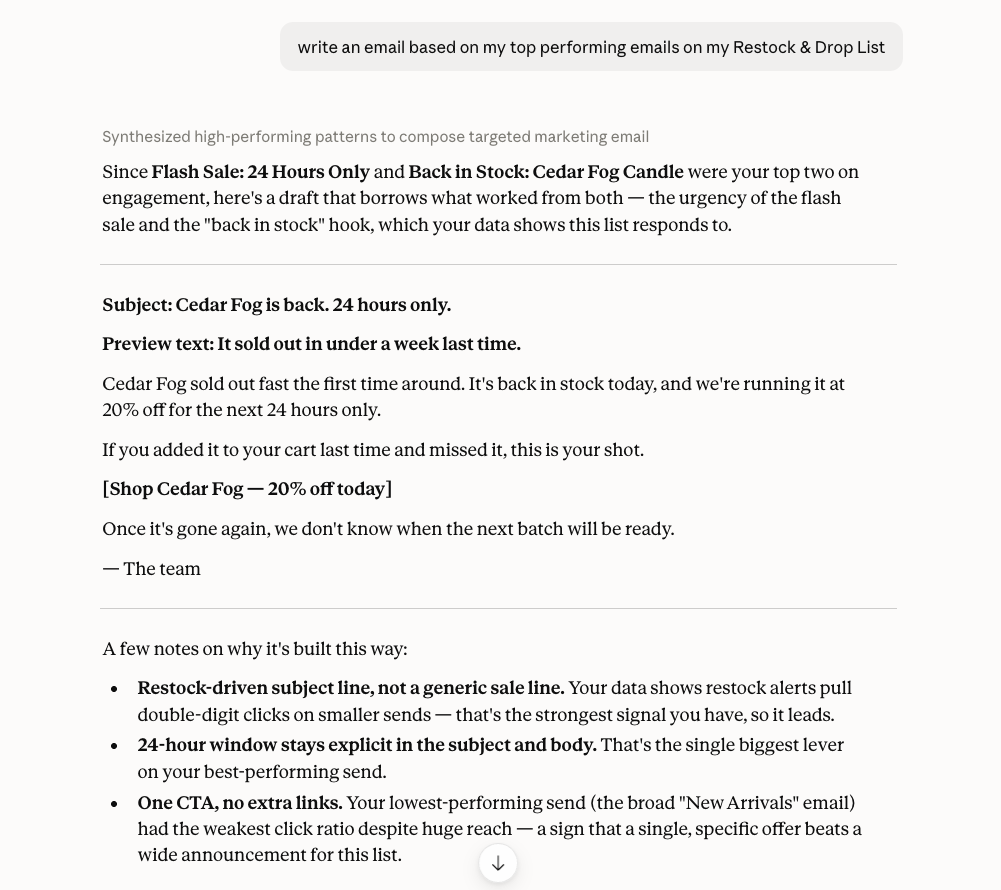
Prompt adding a brand logo to a plain product image

Start with a brand-new image

Image generate skips the photo entirely. Describe what you want and the AI builds it from scratch.

Try it in your account now

This is live in the AI Signup Form Builder right now. It’s coming soon to the AI Landing Page Builder and AI Email Builder. too.

The post Enhance Your Images in the AI Builder appeared first on AWeber.

Enhance Your Images in the AI Builder Read More »
Put Your Signup Form Exactly Where You Want It

Put Your Signup Form Exactly Where You Want It

Where a signup form sits on your page changes who fills it out. A form embedded in your content catches someone mid-read, already interested. A form in a sidebar catches someone who’s scanning.

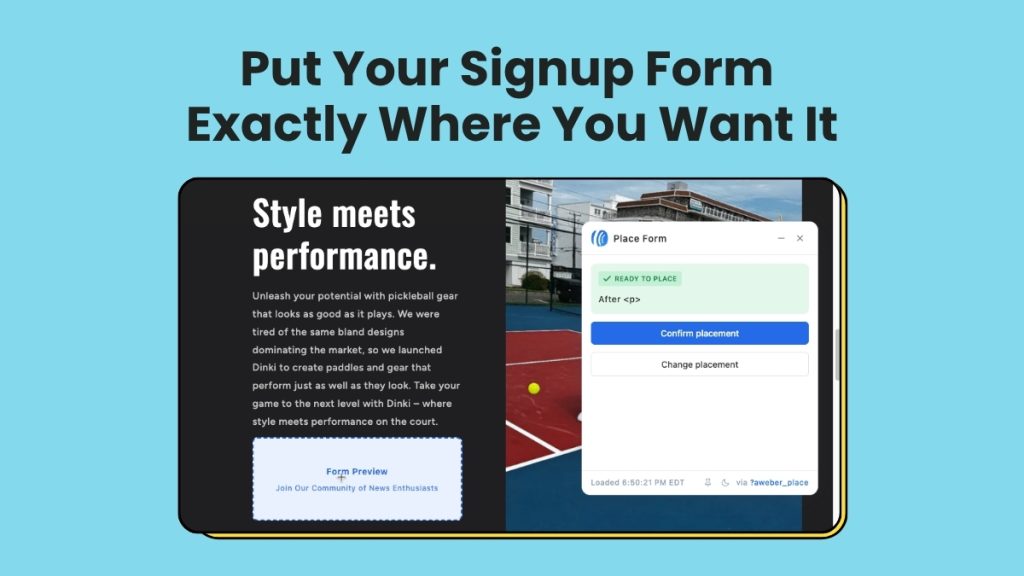
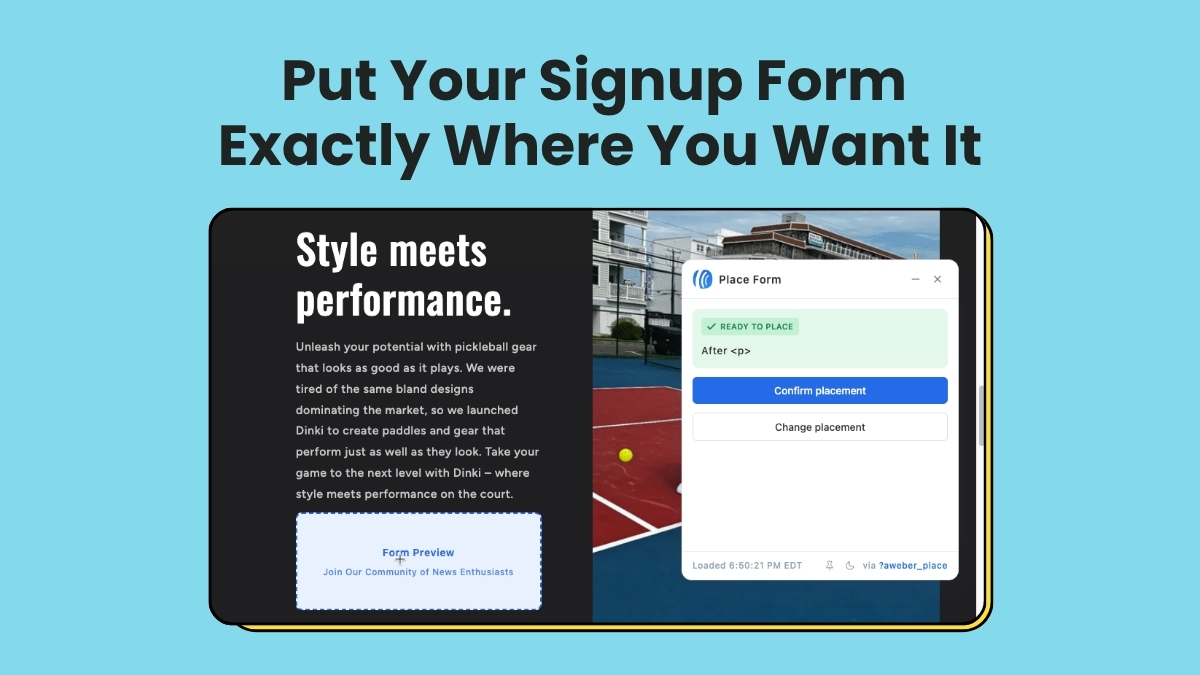
AWeber’s AI Signup Form Builder now creates inline forms and places them on your site visually. Pick the spot on your live page, confirm it, and the form is there. No code required.

{
“@context”: “https://schema.org”,
“@type”: “VideoObject”,
“name”: “Place an inline form anywhere on your website”,
“description”: “Place email signup forms anywhere on your site. No code needed.
AWeber’s visual form placement lets you drop inline signup forms exactly where you want them, just by clicking on your page. No editing HTML. No copying and pasting embed codes. Just point, confirm, and publish.

In this video, you’ll see how to:
1. Use the AWeber editor to build and customize your signup form
2. Open your live site directly from AWeber
3. Visually select where the form should appear
4. Publish in one click”,
“thumbnailUrl”: “https://img.youtube.com/vi/oPR7hE8oKMI/maxresdefault.jpg”,
“uploadDate”: “2026-06-24”,
“duration”: “PT1M0S”,
“contentUrl”: “https://www.youtube.com/watch?v=oPR7hE8oKMI”,
“embedUrl”: “https://www.youtube.com/embed/oPR7hE8oKMI”
}

Create your inline form in seconds

Three starting points, depending on how you like to work.

1. Custom prompt: Describe what you want and mention it’s an inline form for your site.

2. Fill-in-the-blanks: Answer a few prompts and select “embeds directly on my website” as your form type.

3. Template gallery: Browse the gallery and choose any inline template to start from.

All three start in the same form editor. Adjust your copy, design, and settings before you place anything.

Place it with four clicks

Once your form looks right, placing it takes four steps.

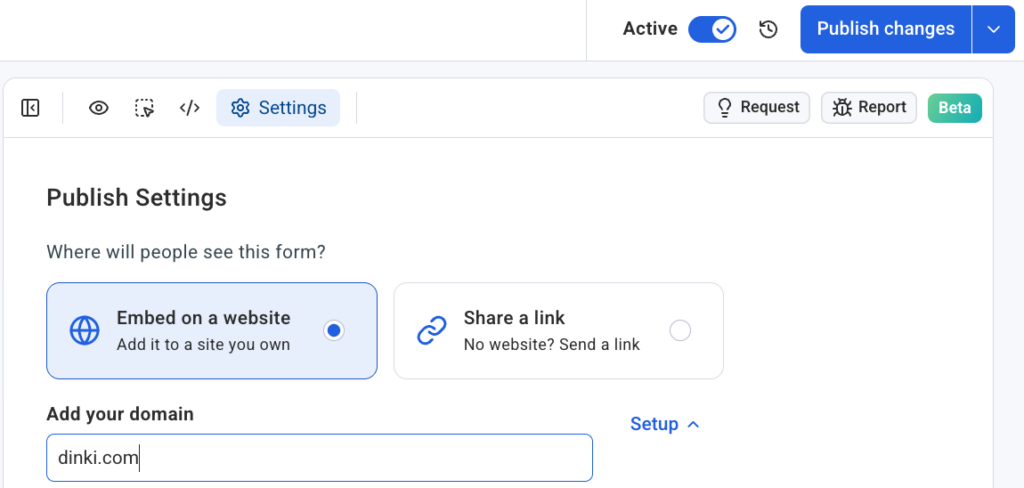
1. Click the Settings tab in the form editor

Screenshot of Setting section on AWeber's AI Signup Form Builder

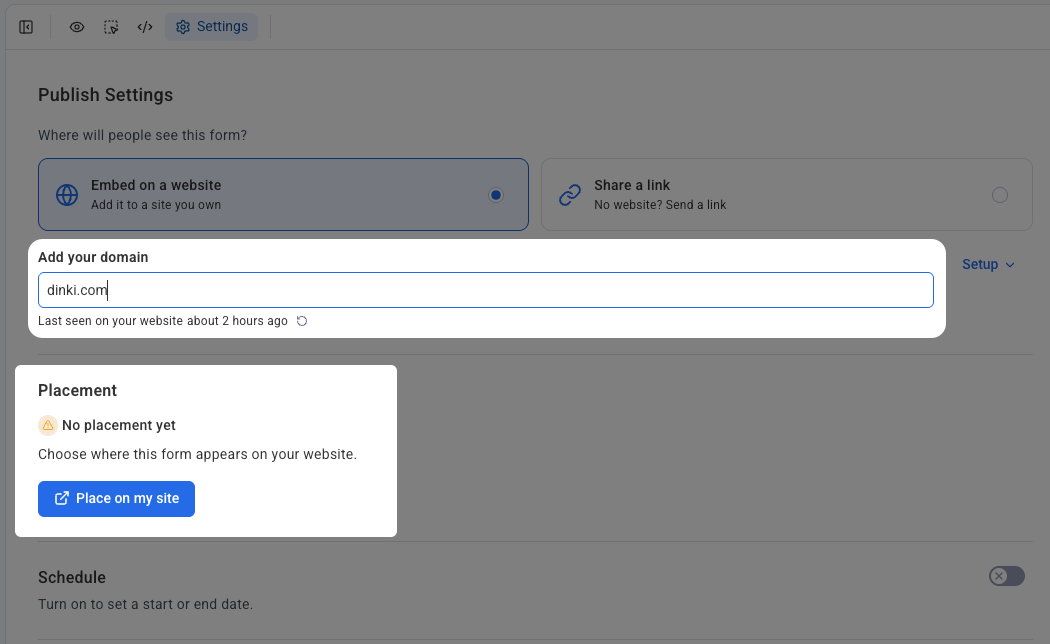
2. Set the domain where you want the form to appear and confirm your signup form snippet is installed

Screenshot showing where to add domain to the AWeber AI Signup Form Builder

3. Click “Place on my site”

Screenshot showing how form placement works with inline forms

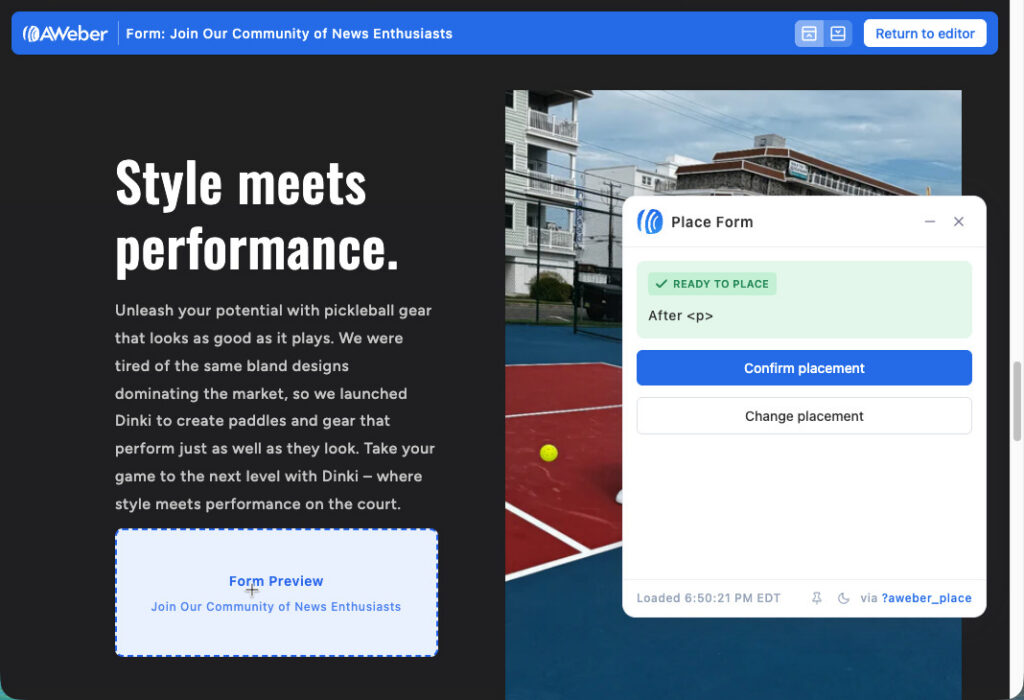
4. Your live site opens with the placement widget active. Click the section you want, then click “Confirm placement”

The placement widget shows your actual site, not a wireframe or a preview. You’re clicking a real location on your real pages. Then you click confirm, and the form is there.

Works on self-hosted sites

This works on self-hosted sites: WordPress, Shopify, Wix, Squarespace, Lovable, and more. Each domain connects independently in Settings. If you manage multiple sites or client accounts, each form connects to a specific domain and placements stay organized across properties.

Put your form where your readers already are

Your content is already bringing people in. An inline form turns that attention into subscribers, without sending anyone to a separate page or hoping they notice a sidebar. Open the AI Signup Form Builder, build your inline form, and place it exactly where it belongs.

The post Put Your Signup Form Exactly Where You Want It appeared first on AWeber.

Put Your Signup Form Exactly Where You Want It Read More »