
UA has now sunset, but it’s not too late to migrate to Google Analytics 4 and start using the platform’s expanded e-commerce capabilities.
GA4 e-commerce is a comprehensive suite of tools that give you deeper, more granular insights into the health of your store and the behavior of customers. There’s a lot to get your head around, which is why I’m devoting an entire post to the topic.
In this post, I’ll show you how to get your GA4 e-commerce setup right, explain why it’s so much better than its UA predecessor, outline all of the different interactions you can track with the platform, and show you how to expand your e-commerce reports to squeeze every drop of value from them.
Ready to learn how to get to grips with GA4 e-commerce? Then let’s begin.
What’s New With E-Commerce in GA4?
There are quite a few things that are different when it comes to using GA4 for e-commerce tracking compared to Universal Analytics.
As you’ll know if you’ve read my in-depth guide to Google Analytics 4, the latest version of the platform tracks events rather than sessions or page views. That means you can track way more customer interactions, including who looked at a product and how many people added or removed products from your cart.
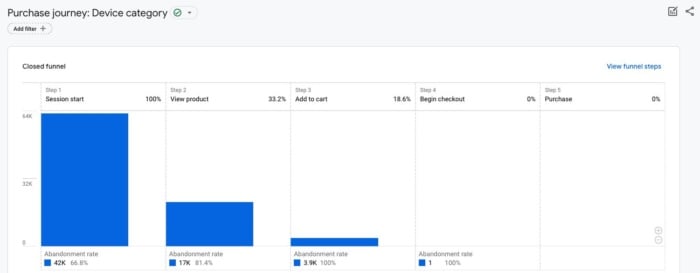
The cross-device tracking capabilities of GA4 mean you get a complete view of your customer. You aren’t stuck with last-touch attribution, meaning you can create a comprehensive sales funnel out of a series of GA4 e-commerce events (like subscribing to your newsletter, clicking an email link, adding an item to a cart, etc.). Previously this was only possible using the premium version of Universal Analytics.
Finally, the platform’s new predictive analytics capabilities mean you can analyze and predict customer behavior in a way that simply wasn’t possible with Universal Analytics. For example, you can use GA4 to predict the purchase probability of each acquisition or the churn probability of each of your customers.
Is GA4 Better than UA for E-Commerce?
So how does GA4 vs Universal Analytics compare when it comes to e-commerce features? I think it’s fair to say GA4, while it takes a bit of getting used to, is a lot better for online store owners.
Event tracking gives store owners loads more data and insights, for one. It’s much easier to build a complete picture of the customer journey, see how users interact with your products, and understand where there is conversion-related friction.
You also get a much more accurate representation of data now that GA4 doesn’t use data sampling. The increase in real-time reports also makes it easier to understand what’s happening on your store right now.
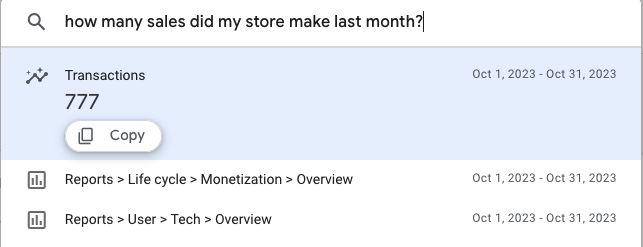
GA4’s search bar is better and more intuitive, too. You can literally ask it a question like “how many sales did my store make last month?” and it will give you the answer in a dropdown like you see below:
How to Set Up GA4 E-Commerce Tracking With Google Tag Manager
Setting up e-commerce tracking in GA4 isn’t as straightforward as it might be. That’s because Google doesn’t automatically collect e-commerce event data from your website and app. So you’ll need to add e-commerce events to your website using either Google Tag Manager or Global Site Tag in order to access Enhanced E-commerce in GA4.
Because Tag Manager is easier to set up and more secure, it’s what I’m going to use in this guide.
I’m also going to show you how to do it from scratch. Google has a helpful guide on how to update an existing UA Tag Manager-based analytics e-commerce implementation to use GA4 e-commerce events instead.
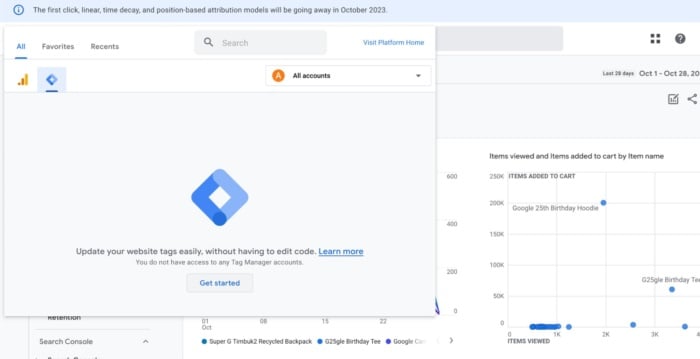
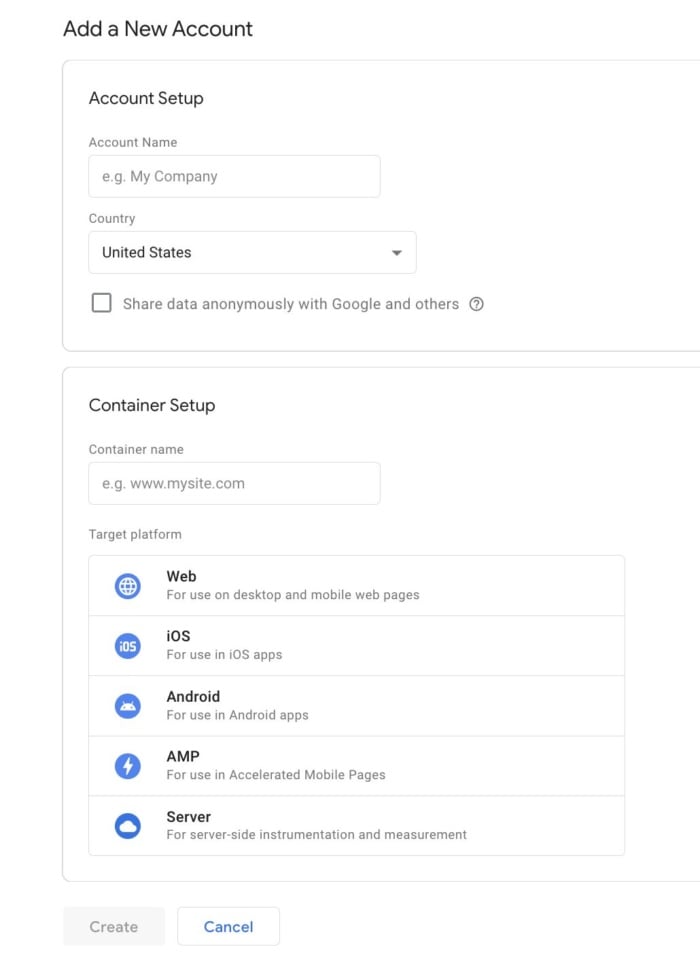
Start by logging into your analytics account and accessing Google Tag Manager by clicking on the All Accounts tab at the top of the screen. Click on the Tag Manager icon (it looks like a blue diamond) and then click Get started.
You’ll need to create a new account if this is your first time using Tag Manager. By doing so, you can manage all of your tags in one place.
Next, you’ll need to install Google Tag Manager on your site. You’ll get the installation code and instructions immediately after creating an account, but you can also access them at any time from the Workspace section of your Tag Manager account.
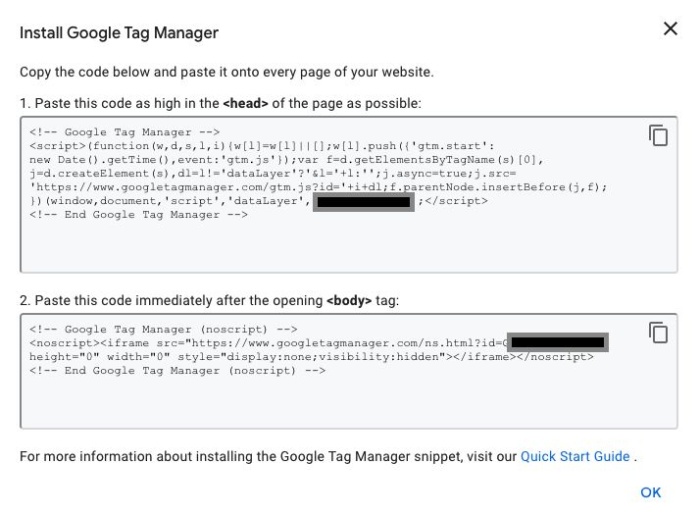
If you’re using a CMS or e-commerce platform like WordPress or Shopify, there will almost certainly be a plugin that will help. (Here’s one for WordPress and one for Shopify). If not, then simply copy and paste the code snippets into the <head> of your page’s HTML.
Once you’ve got Google Tag Manager set up, it’s a three-step process to set up e-commerce tracking. You’ll need to:
- Create data layers
- Create a Google Tag (formerly Google Configuration Tag)
- Create GA4 event tags
Create a Data Layer
A data layer holds information about user behavior on your website and it’s how Google learns about all the interactions that take place.
You’ll need to add a data layer for every interaction you want Google to track. There are six actions you can track as standard. These are:
- Select an item from a list
- View item details
- Add or remove an item from a shopping cart
- Initiate the checkout process
- Make a purchase or issue a refund
- Apply promotions
For each of these interactions, you’ll need to add a specific piece of code to your website to act as a data layer. You can find them all on Google’s developer website, but here’s a snapshot of what one looks like:
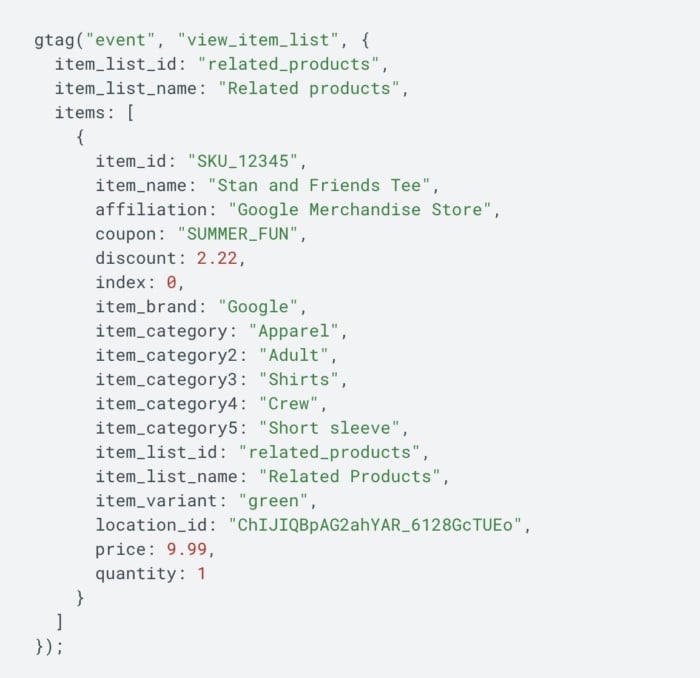
You can ask your developer for help with this if you aren’t familiar with adding code to your website’s files. Alternatively, if you are using WooCommerce, you can use the Datalayer for WooCommerce extension to automate the process.
Once you’ve added the code to the website, you’ll need to create a data layer in Tag Manager.
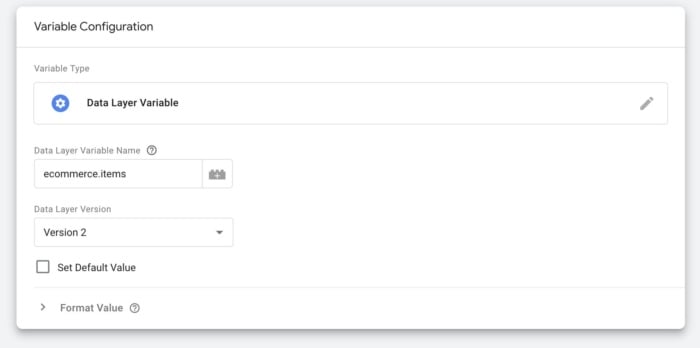
Click on the Variables tab in the left-hand sidebar of your Tag Manager Workspace and then add a new User-Defined Variable.
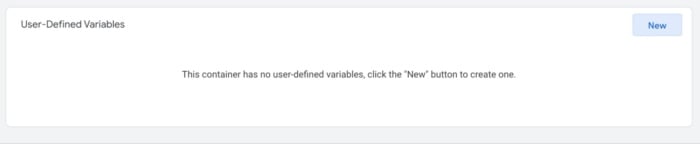
Click on Variable Configuration and choose Data Layer Variable. Name the variable something like ecommerce.items and hit save.
Create a Google Tag
Now, we need to associate your Google Tag Manager account with your GA4 account. We can use the Google Tag (formerly called a Google Analytics 4 configuration tag) to do just that.
Click on the New Tag section on your Tag Manager workspace and then click Tag Configuration and then choose Google Tag.
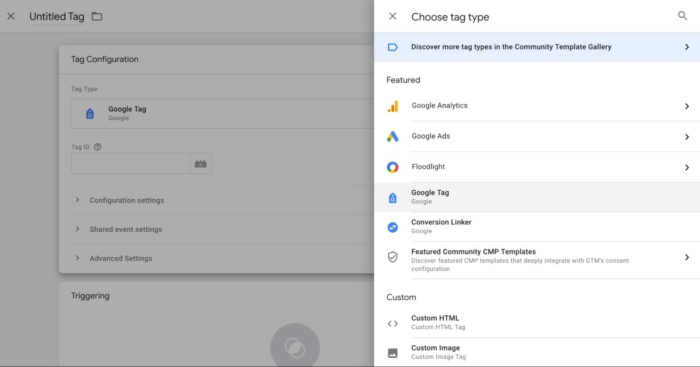
Enter your GA4 measurement ID in the Tag ID section (you can find this in the Account section of your GA4 dashboard).
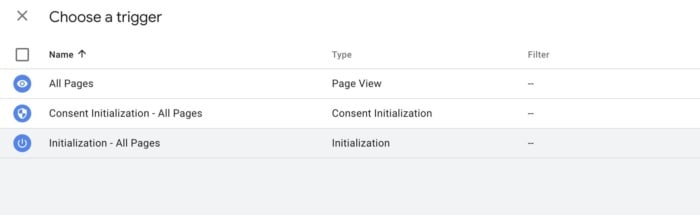
Then click on the Triggering section and choose Initialization – All Pages. This ensures the Google Tag triggers immediately before any other tags.
Name the tag, click save, and you’re done.
Create GA4 Event Tags
Finally, we need to create event tags for each of the e-commerce events we added a data layer about.
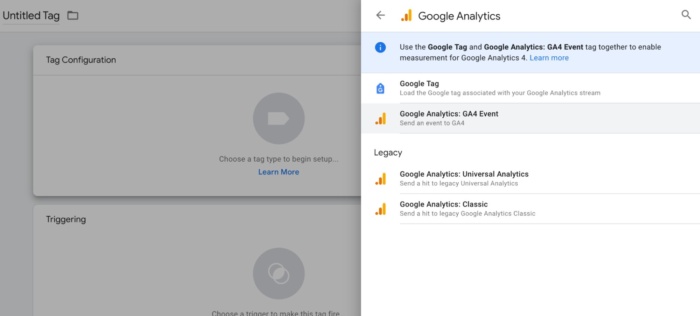
Click New Tag again, but this time navigate to Google Analytics → Google Analytics: GA4 Event
You’ll want to add an event tag for all of Google’s recommended e-commerce events. You’ll notice that there are a few more events listed here than the ones we added data layers for. That’s because GA4 automatically tracks some of this information without additional data layers.
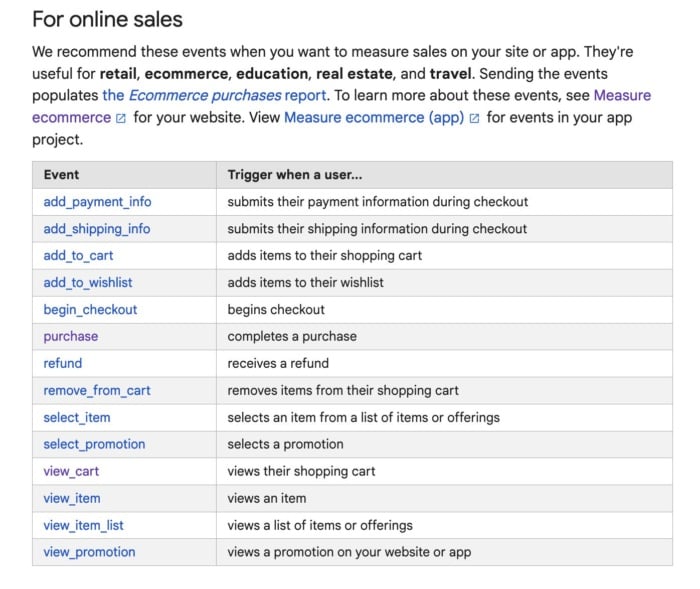
Unfortunately, you’ll want to add event tags for ALL of the events in this list. I’ll show you how to do one as an example.
Select the Google Tag we made earlier as the Configuration Tag and then give a name to the event. I’m going to use the view item event as an example.
Give your event a name (I’ve chosen view_item).
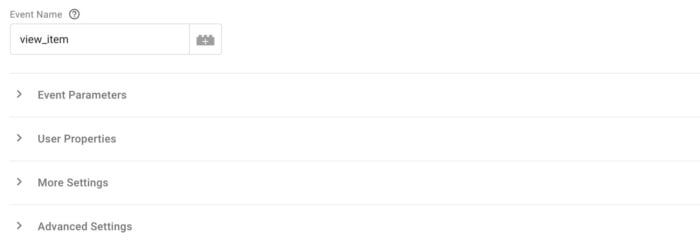
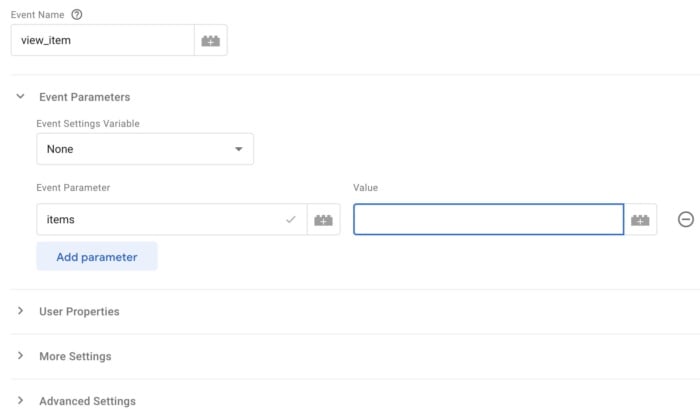
Then click on Event Parameters and Add parameter.
I’ll add items as a parameter and then click the data layer we created previously.
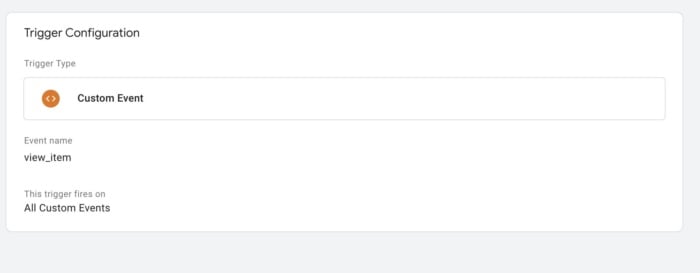
Finally, we need to set up the trigger.
Click on Triggering and then the blue + in the top right-hand corner. This will let us build custom triggers to track specific events.
Click Trigger Configuration, then scroll down to find Custom Event.
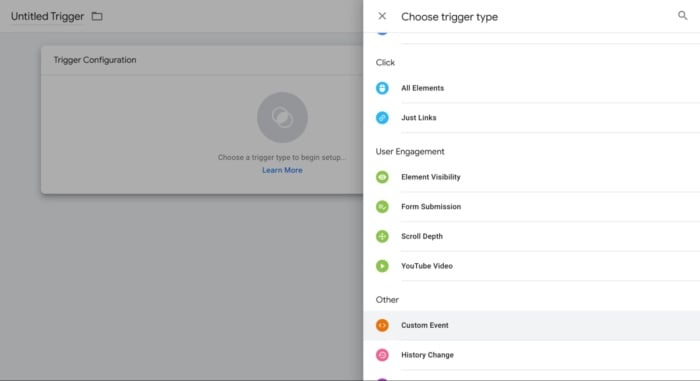
Put view_item as the trigger name and click save.
Well done, you’ve just set up GA4-enhanced e-commerce. Now you’ll need to go back and do it for all of the e-commerce events you want to track to completely finish your GA4 e-commerce setup.
Ask your developer for help if you get stuck or follow Google’s guide to setting up e-commerce events.
Verify Your Configuration
It can take up to 24 hours to populate GA4 with your e-commerce data, but you don’t have to wait that long to verify everything is set up correctly.
You can use Google Tag Manager’s Preview mode (found in the top right of your Workspace) to check everything is being recorded.
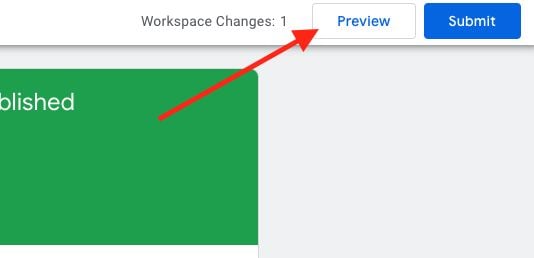
Enter your site’s URL, and then go ahead and click on some products, add them to your cart, and even complete a purchase. Check the Summary bar, and you should see a list of events, including the tags that did and didn’t fire, the types of variables and the messages that were pushed to the data layer.
If everything is being recorded, then you’ve set up e-commerce events correctly!
You can double-check this by opening up GA4’s real-time reports to make sure your product views and purchases have been recorded.
New and Expanded E-Commerce Metrics
Google is still developing GA4 and adding functionality. This included creating new and expanded GA4 e-commerce metrics
In July 2023, Google released dozens of new e-commerce dimensions and metrics that add more depth to custom and pre-built reports.
Google added the following dimensions:
- Item affiliation
- Item brand
- Item category
- Item category 2
- Item category 3
- Item category 4
- Item category 5
- Item ID
- Item list ID
- Item list name
- Item list position
- Item location ID
- Item name
- Item promotion creative name
- Item promotion creative slot
- Item promotion name
- Item variant
- Shipping tier
And the following metrics:
- Gross item revenue
- Gross purchase revenue
- Item refund amount
- Item revenue
- Items added to cart
- Items checked out
- Items clicked in promotion
- Items purchased
- Items viewed
- Items viewed in list
- Items viewed in promotion
- Purchase revenue
- Refund amount
- Shipping amount
- Tax amount
How GA4 Can Enhance Your E-Commerce Reports
GA4’s out-of-the-box reporting is less comprehensive than Universal Analytics, but it still gives store owners and digital marketers all the data they need.
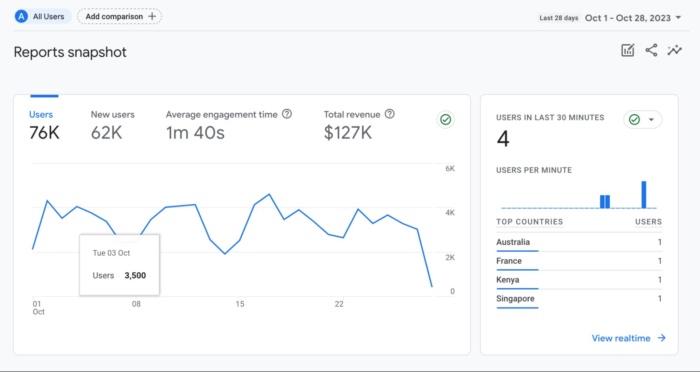
As soon as you click on the reports tab in GA4, you are greeted with a snapshot of your store’s performance over the last 28 days, as well as a real-time view of the number of users on your site in the last 30 minutes.
GA4 offers a more in-depth real-time report, too. The Realtime overview shows how many users are on your site in the last 30 minutes, where they’ve come from, what device they use, and which pages they visited.
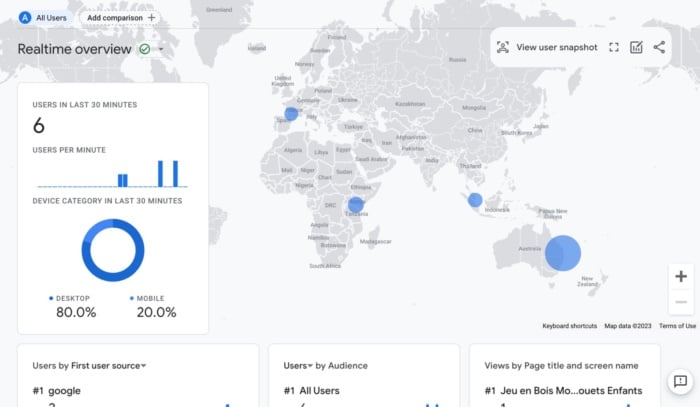
This can be a great way to track the impact and performance of marketing campaigns or sales emails, allowing you to make changes to your site on the fly to improve conversion rates.
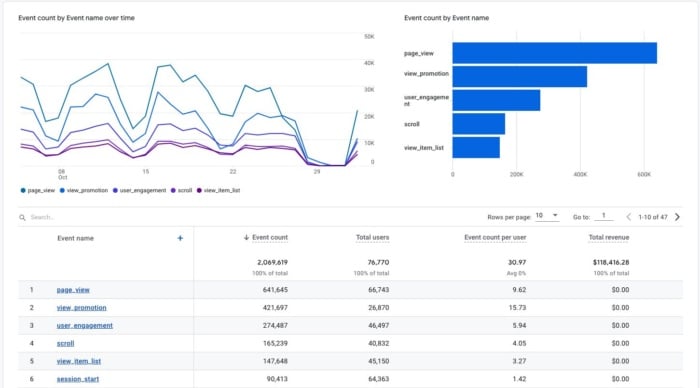
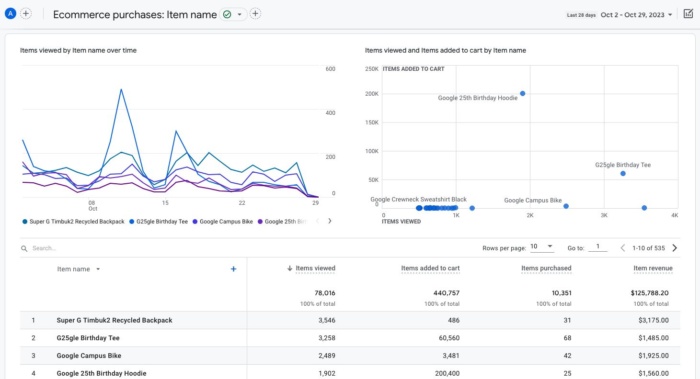
The e-commerce purchases report will probably offer the most value to store owners. Found under Reports → Monetization, it shows your best-performing products. You can also see how often items get viewed and added to the cart.
That’s just the tip of the iceberg when it comes to GA4’s reporting capabilities. If you really want to dive deeper into your data, then use Explorations to create custom reports. Here you can create reports on just about any metric or event you can imagine.
Better still, custom explorations can be exported to Google Sheets for further analysis or turned into visualizations within the platform to better understand your data.
FAQs
You can turn on e-commerce tracking by navigating to the E-commerce Settings under GA4’s Admin section and then toggling the slider to activate e-commerce. You’ll then need to configure events, tags, and triggers as I’ve described above.
You can create a purchase event in GA4 by adding a specific data layer on the checkout page. Integrate this with Google Tag Manager (GTM) to create a custom event, data layer variable, and tag. Ensure the event captures essential purchase parameters like product details and transaction value.
While GA4 can function without Google Tag Manager (GTM), using GTM simplifies the process of adding and managing tags. GTM offers flexibility in tracking custom events, integrating third-party tools, and streamlining the setup of GA4 e-commerce tracking. I highly recommend using it.
Conclusion
GA4’s e-commerce capabilities are seriously impressive. You can use the platform to understand exactly how users interact with your store, which products are most popular, and where your best customers come from. All of these insights can help you improve your e-commerce marketing and user experience.
So even if the platform can be a bit challenging to start with, don’t let it put you off. Execute a GA4 migration, get your GA4 e-commerce setup correct, as I’ve discussed above, and then use my tips to maximize e-commerce revenue and growth.
What events are you using GA4 e-commerce to track?

See How My Agency Can Drive More Traffic to Your Website
- SEO - unlock more SEO traffic. See real results.
- Content Marketing - our team creates epic content that will get shared, get links, and attract traffic.
- Paid Media - effective paid strategies with clear ROI.
Are You Using Google Ads? Try Our FREE Ads Grader!
Stop wasting money and unlock the hidden potential of your advertising.
- Discover the power of intentional advertising.
- Reach your ideal target audience.
- Maximize ad spend efficiency.
[ad_2]
Article link