To provide better service, you likely adjust your business processes to fit your customers’ requirements and preferences. Your website can also change to become friendlier and more usable and reflect the current state of your business.
However, reorganizing a website can inadvertently create broken links. Lots of them.
So, what do you do? You don’t want to scare away your customers with 404 (not found) errors, do you?
The solution is … drumroll … to set up 301 redirects to keep the traffic flowing.
In this guide, we’ll discuss how to create 301 redirects in WordPress, their benefits and their impact on search engine optimization (SEO).
What is a 301 redirect in WordPress?
301 redirects in WordPress permanently redirect web traffic intended for one destination to another.
They’re important because they inform search engines about a change in a page’s location, avoiding the dreaded 404 error and allowing users to access your content.
When to use 301 redirects in WordPress
Setting up a 301 redirect is useful in several instances, such as:
- When migrating from an old site to a new site:A website migration affects the user interface (UI), user experience (UX) and your website’s performance and structure. Changes to the website structure may break links to certain resources. 301 redirects ensure that search engines and users have continued access to those resources.
- When reorganizing the content on your WordPress website: You may want to reorganize your website so it’s easier to manage and enhance its overall usability. In that process, various pieces of content may move to new locations permanently. 301 redirects facilitate continued access for visitors.
- When redirecting users from expired to new content: Imagine you organized a webinar a few months ago. To help users sign up, you created a landing page. After the webinar, the signup form became irrelevant. But since you recorded the webinar, a 301 redirect can forward users to another page where they can watch the video.
- When changing domains: Search engine crawlers have to index the content of a new domain from scratch. However, setting up 301 redirects ensures the traffic and influence of your old domain seamlessly flow to your new domain.
Benefits of using 301 redirects in WordPress
Here are some of the top ways that using 301 redirects in WordPress can be beneficial:
Preserves the SEO value of your pages
301 redirects pass the influence of an old webpage to a new one. If the old page ranked well on search engine results pages (SERPs), the 301 redirect preserves the ranking of the new webpage.
Provides a seamless user experience (UX)
Broken links return a 404 (not found) error page, which can frustrate your visitors and disrupt the UX of your website. A 301 redirect on your WordPress site takes a split second to resolve, and visitors probably won’t even notice when it happens.
Minimizes duplicate pages
While Google won’t penalize your website for having duplicate pages, it can experience difficulty determining which page to show in search results.
Also, Google’s crawlers might fail to detect the similarity between duplicate pages, especially if the URLs have different parameters. Therefore, your pages may compete and rank for the same keywords.
This dilutes the strength of your ranking signals, causing your content to rank lower. However, creating a 301 redirect on an old page to send traffic to a new page fixes this issue.
How to create 301 redirects in WordPress
You have several options to pick from when setting up 301 redirects on a WordPress website. For example, you can edit the .htaccess file, use cPanel, write a PHP script or use a WordPress plugin.
1. Edit the .htaccess file
Htaccess is short for Hypertext Access. A .htaccess file configures Apache web servers to behave in a desired way. (If you have an Nginx server, you’ll need to pick another method.)
Here, we’ll use it to set up a 301 redirect so the web server permanently redirects traffic to a different URL from the intended one.
Editing a .htaccess file is a manual process, which means you can make mistakes. Therefore, ensure you create a backup of your website by copying all the files to a safe location beforehand. This way, you’ll have a restore point if something breaks.
Here’s what you need to do to add a 301 redirect in WordPress using .htaccess. For this example, we’re using Bluehost’s dashboard. If you’re using another host, some parts might look different, but the process is the same.
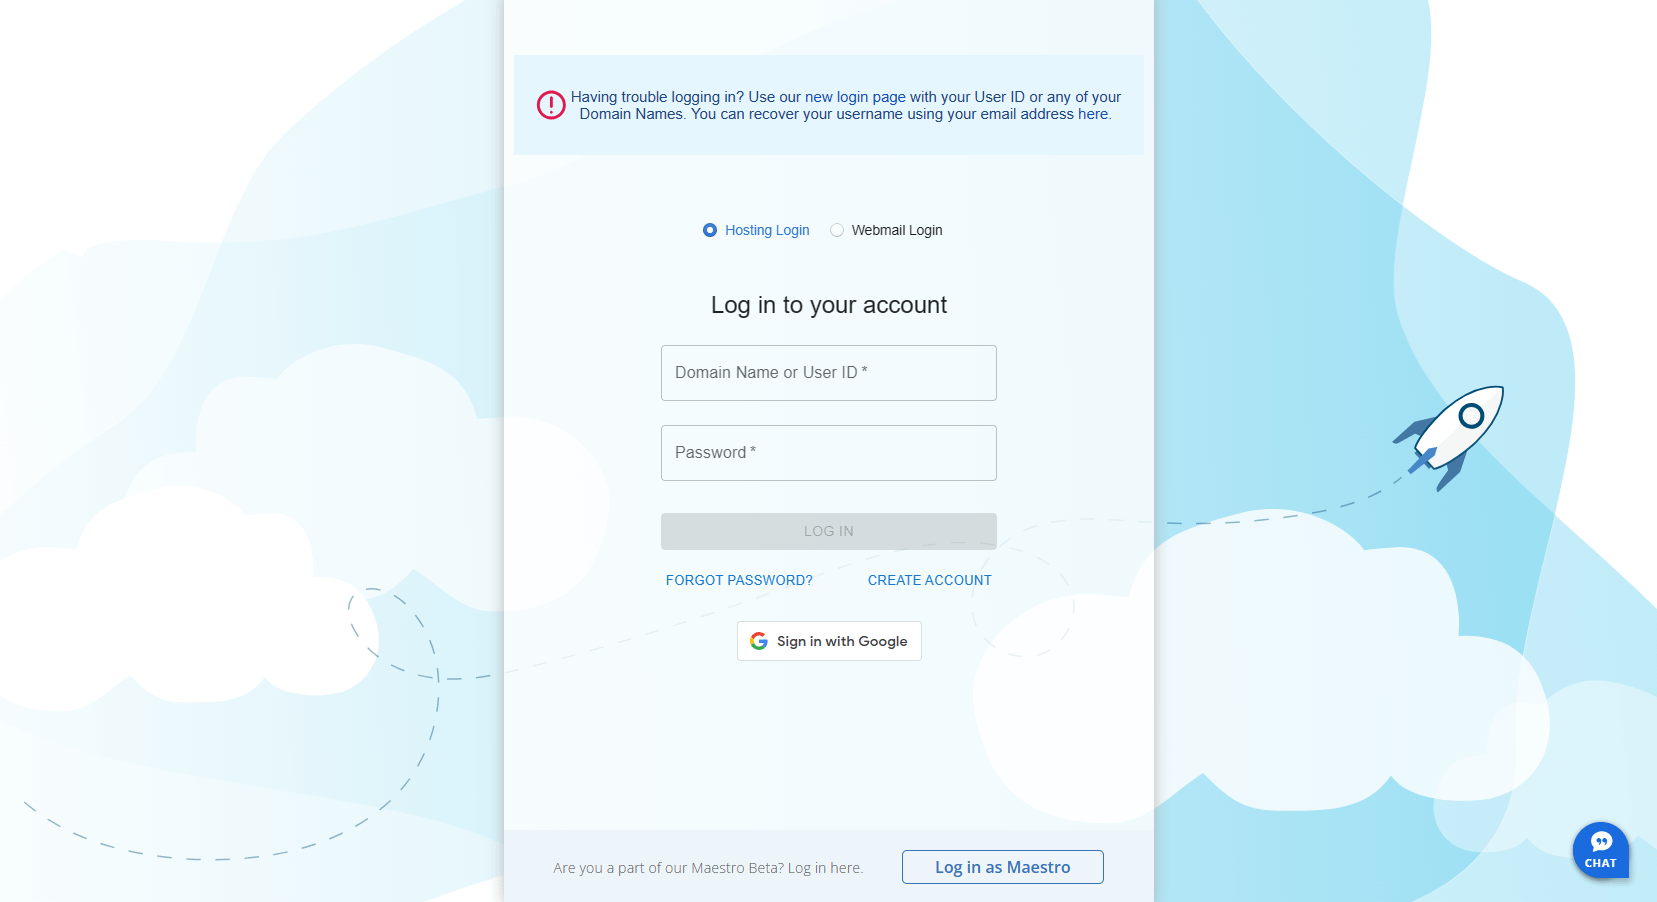
1. Head over to your host’s client area login. Enter your username and password.
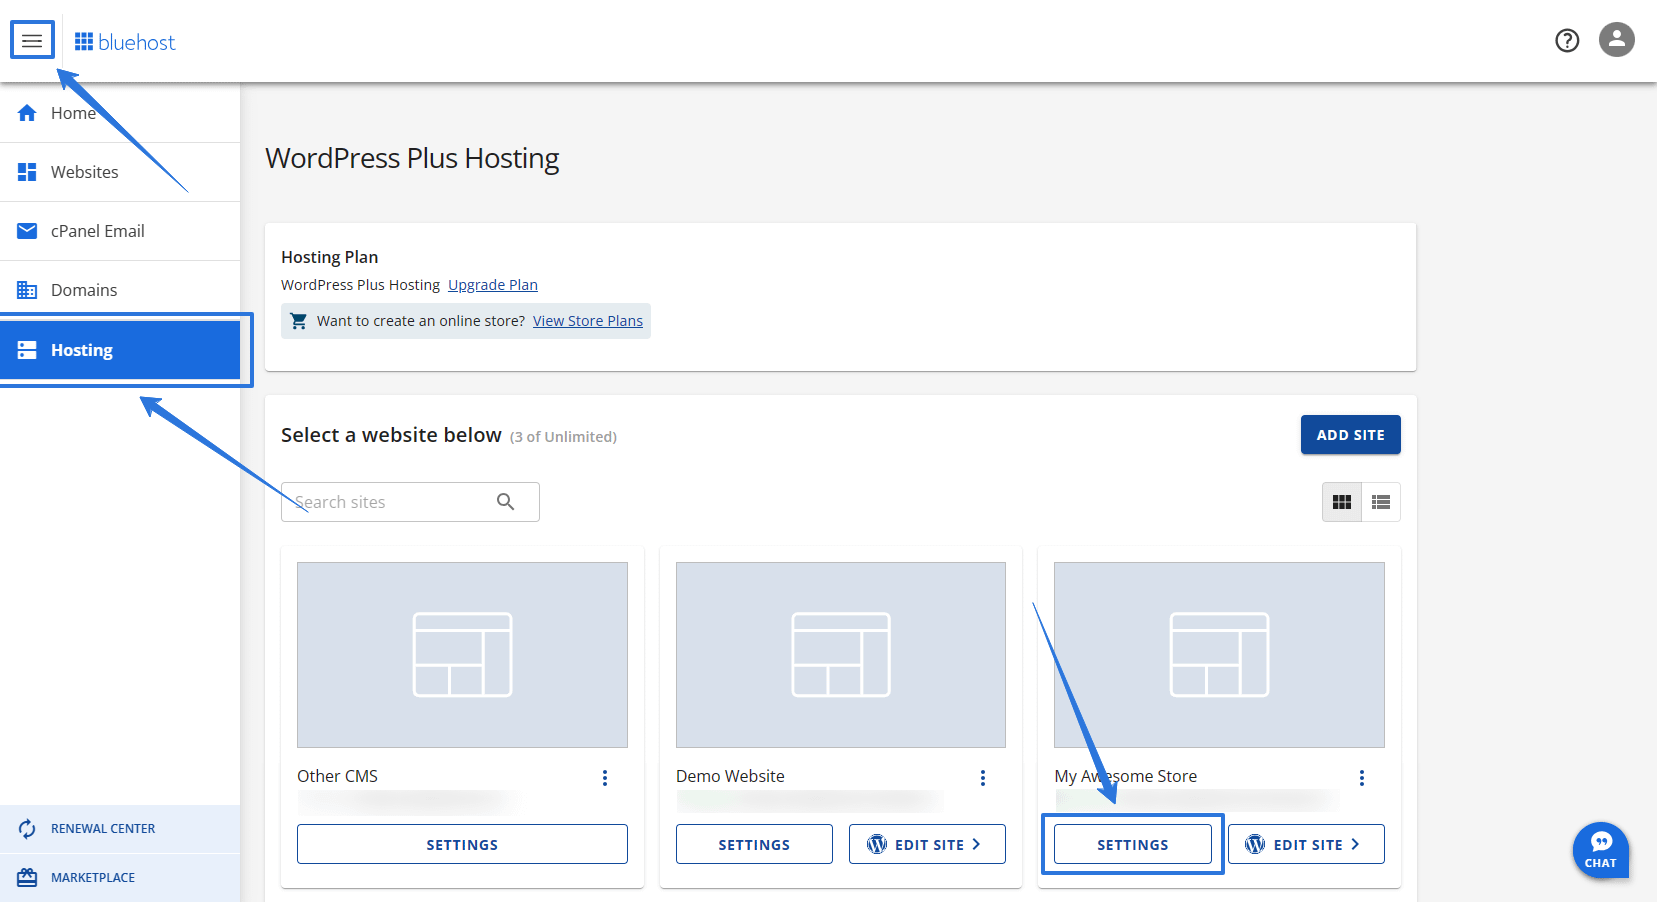
2. On the Welcome page, navigate to the top-left corner and identify the icon with three horizontal lines. Click on it and choose the Hosting option from the menu. You’ll end up on the hosting page below. It has a list of all your websites.
3. Open the Settings page of the website you wish to manage.
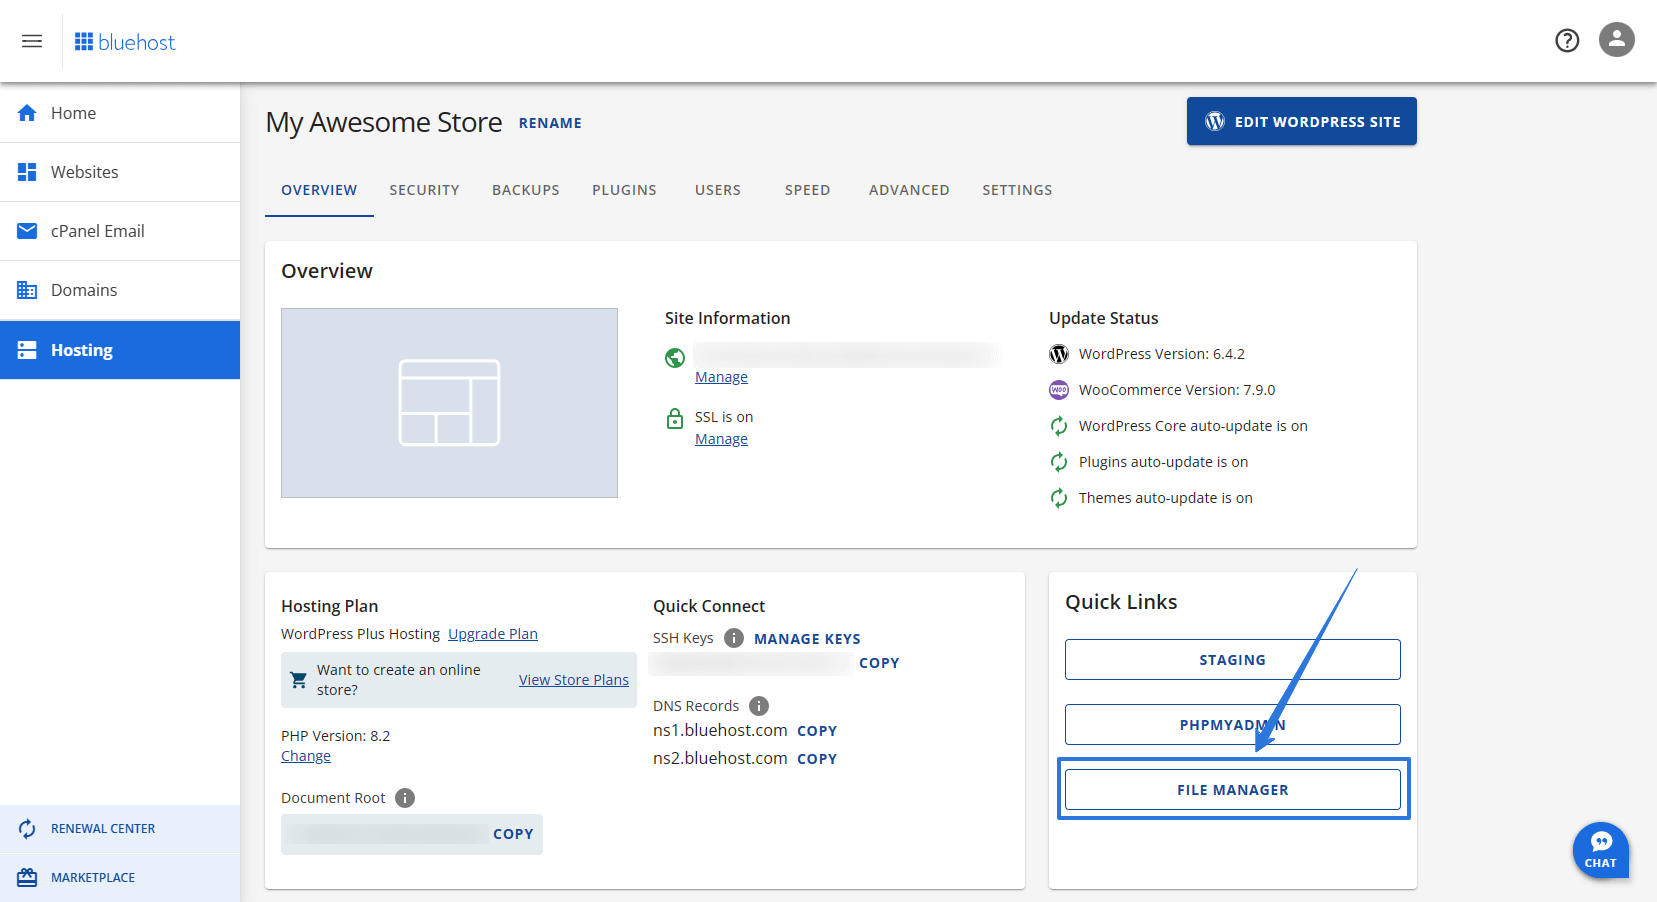
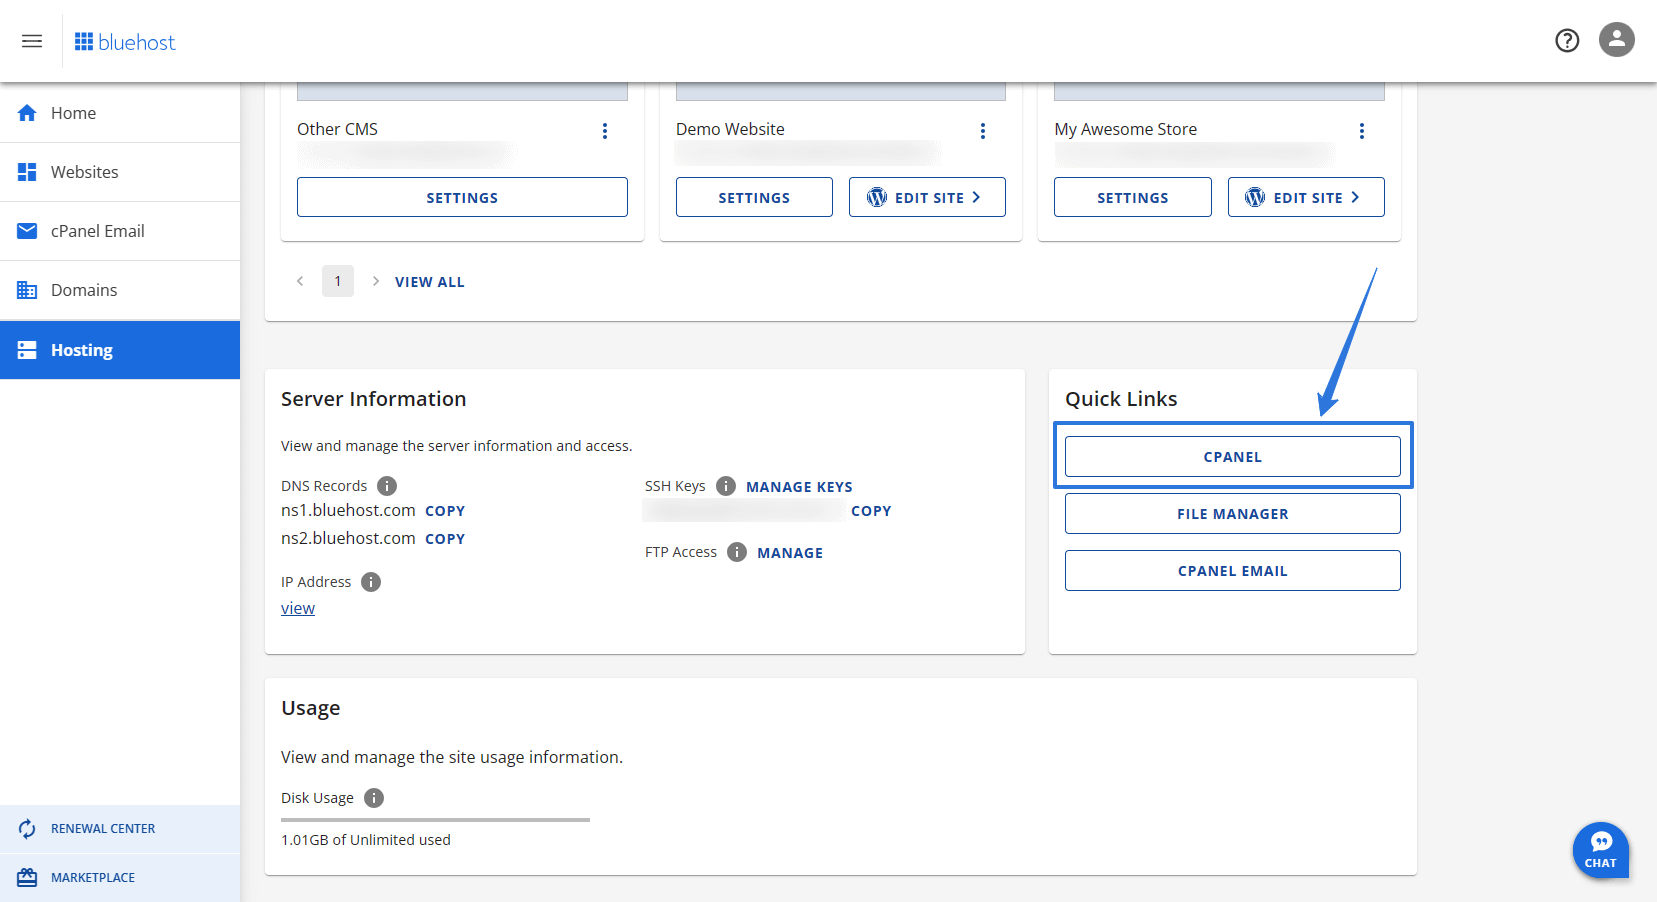
4. Open the File manager from the quick links section.
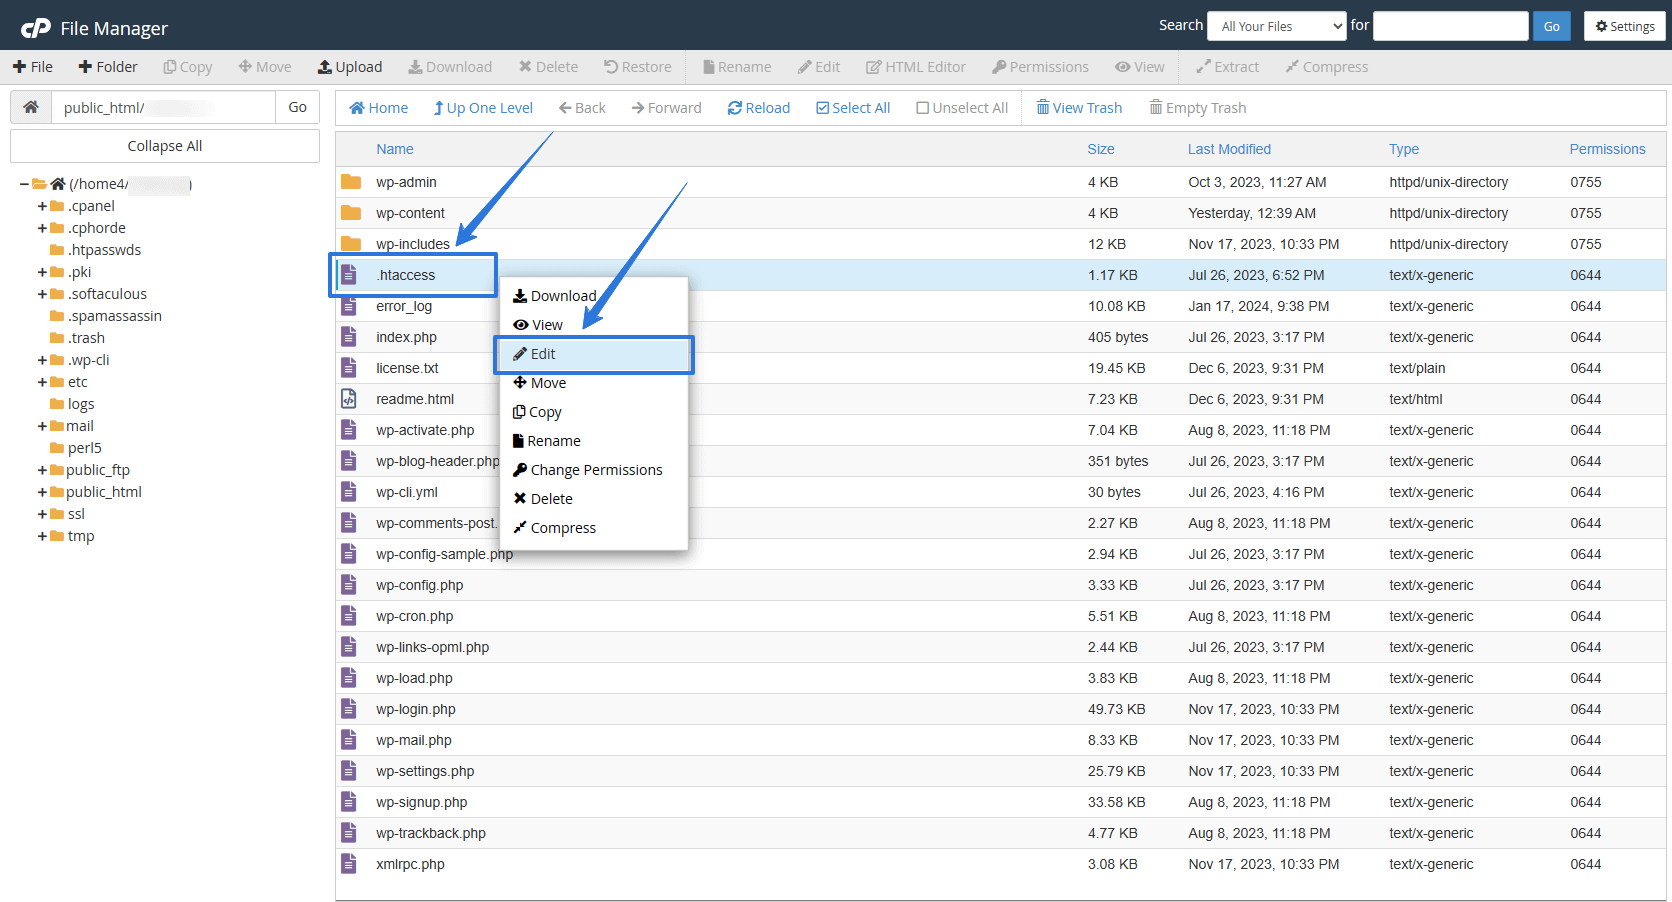
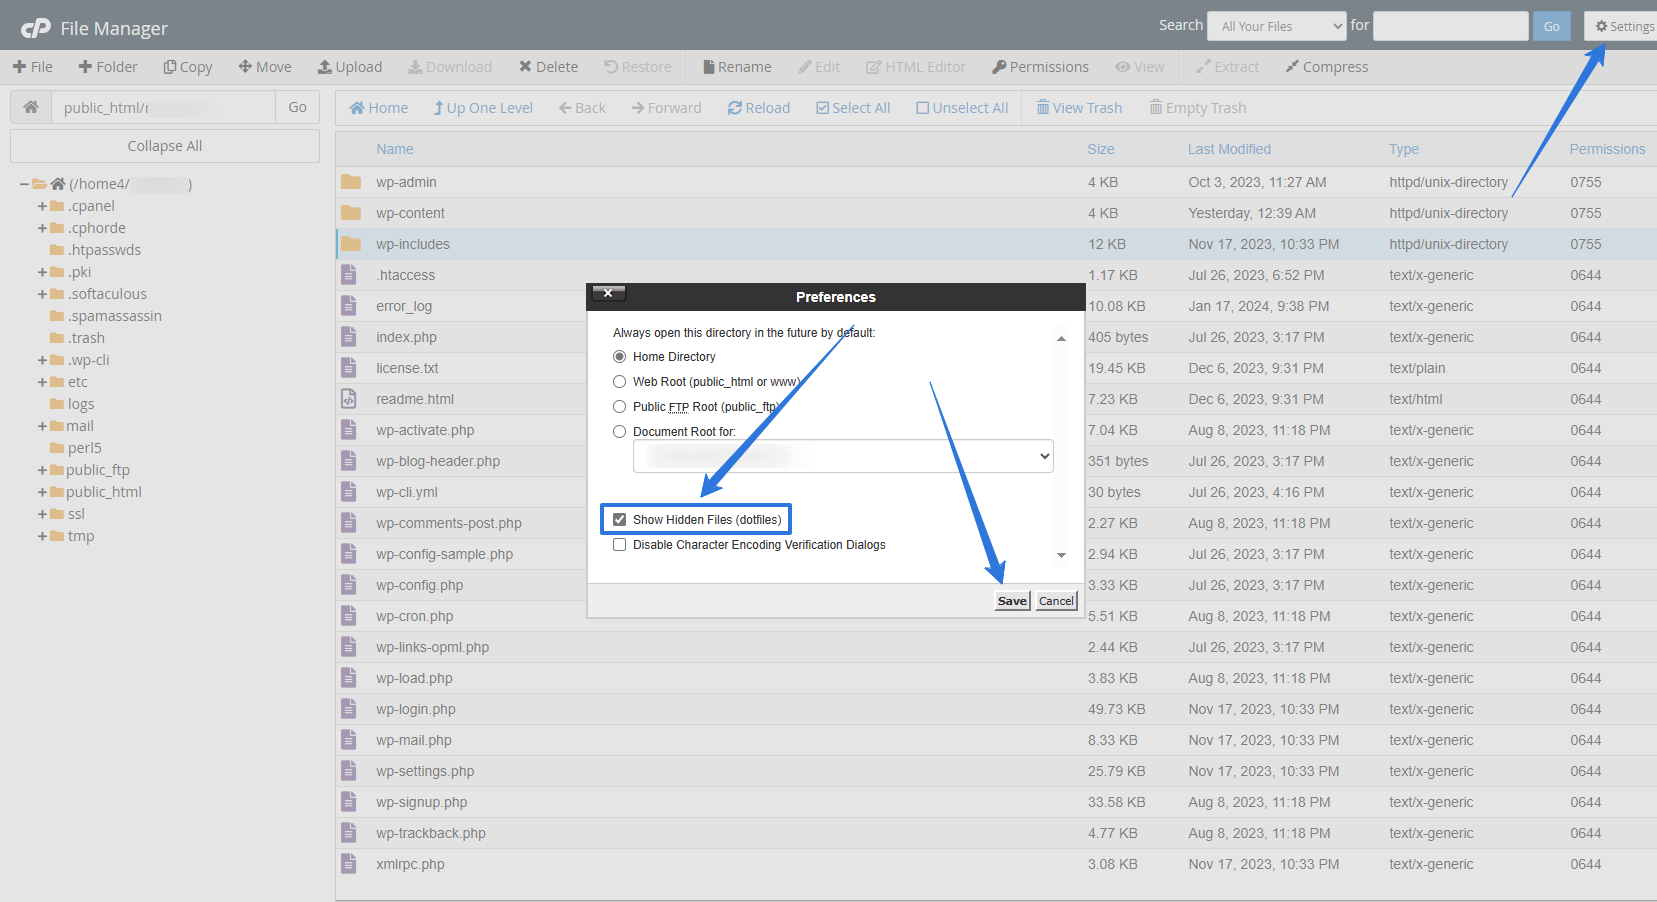
5. The page below will be displayed. It lists all the files your WordPress website needs to run. Locate .htaccess and right-click on it to edit.
If a prompt appears requesting you to change the encoding options, continue editing without changing anything.
Can’t find the .htaccess file?
- Ensure you’re in the public_html folder. You can find it in the folder list on the left column in the image above.
- Check that hidden files are visible. Open Settings from the top-right corner, check the Show hidden files (dotfiles) option and save the changes.
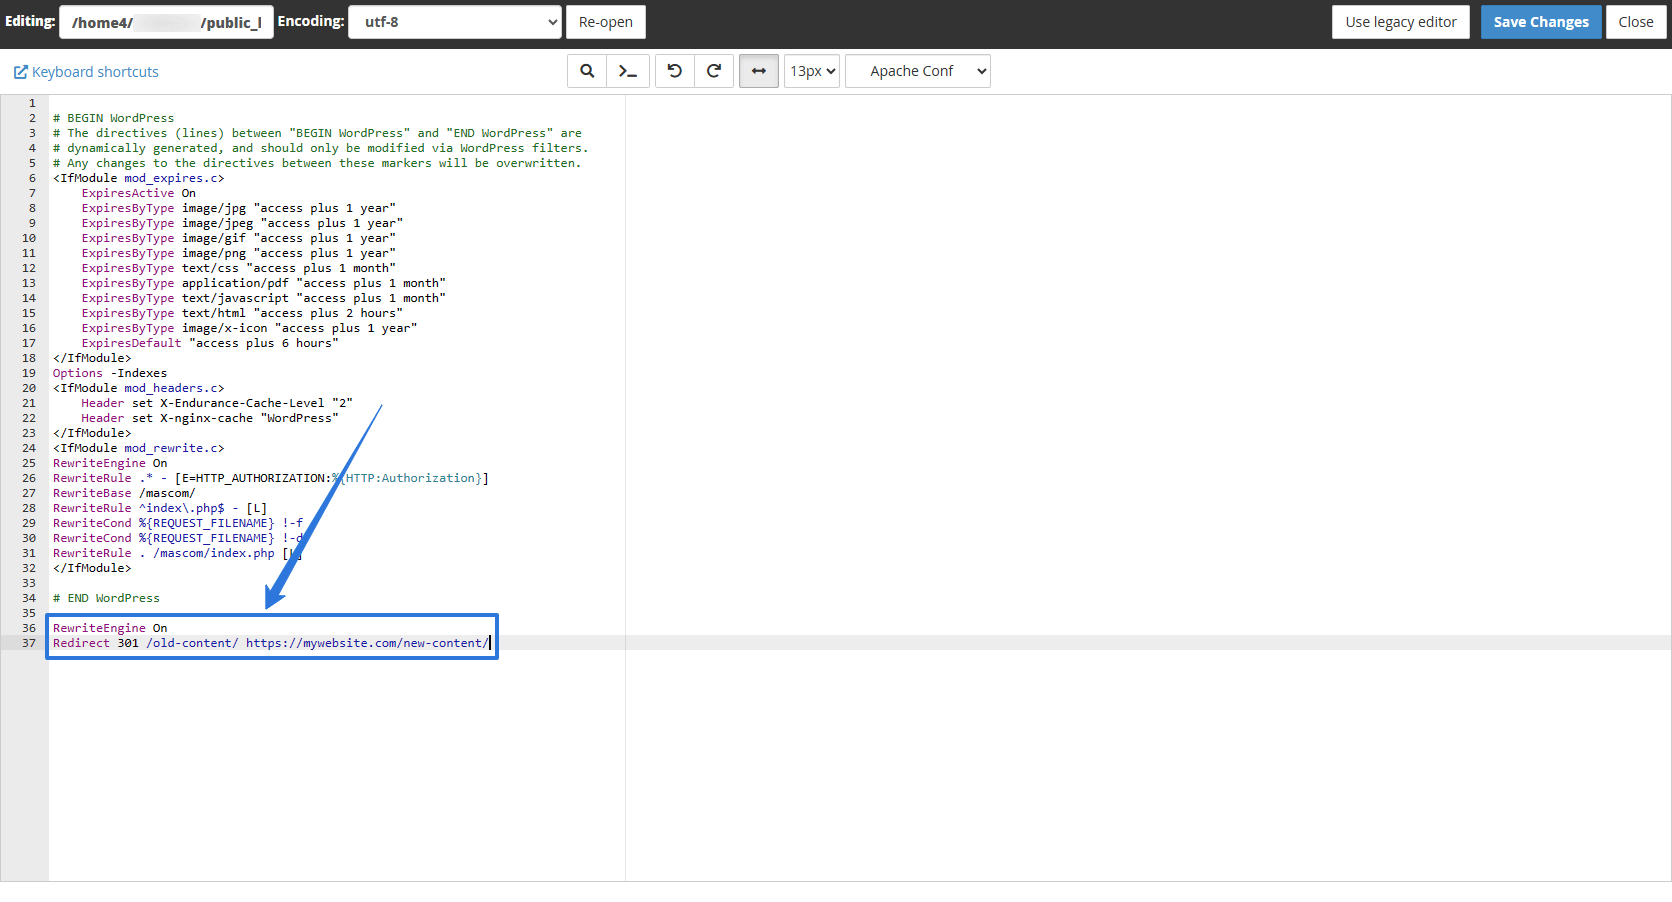
6. If everything goes well, you’ll have the same view of the .htaccess editor as seen below. Add the following text after the last line: “# END WordPress.“
RewriteEngine On
Redirect 301 /old-content/ https://example.com/new-content/
Replace old-content with the original destination URL (old URL) and new-content with the new destination URL. Save your changes and close the editor.
You have successfully created a 301 redirect in WordPress using the .htaccess file and can now check that it’s working in your web browser.
2. Use cPanel
If you’d prefer not to risk issues with the .htaccess file, the cPanel method is a safer alternative. Here’s how to access and use it to create a permanent 301 redirect for WordPress websites.
1. Access your hosting dashboard (we’re using Bluehost). Scroll down and open cPanel from the Quick links section.
2. The cPanel page below will open. Scroll down to the Domains section and open the Redirects page.
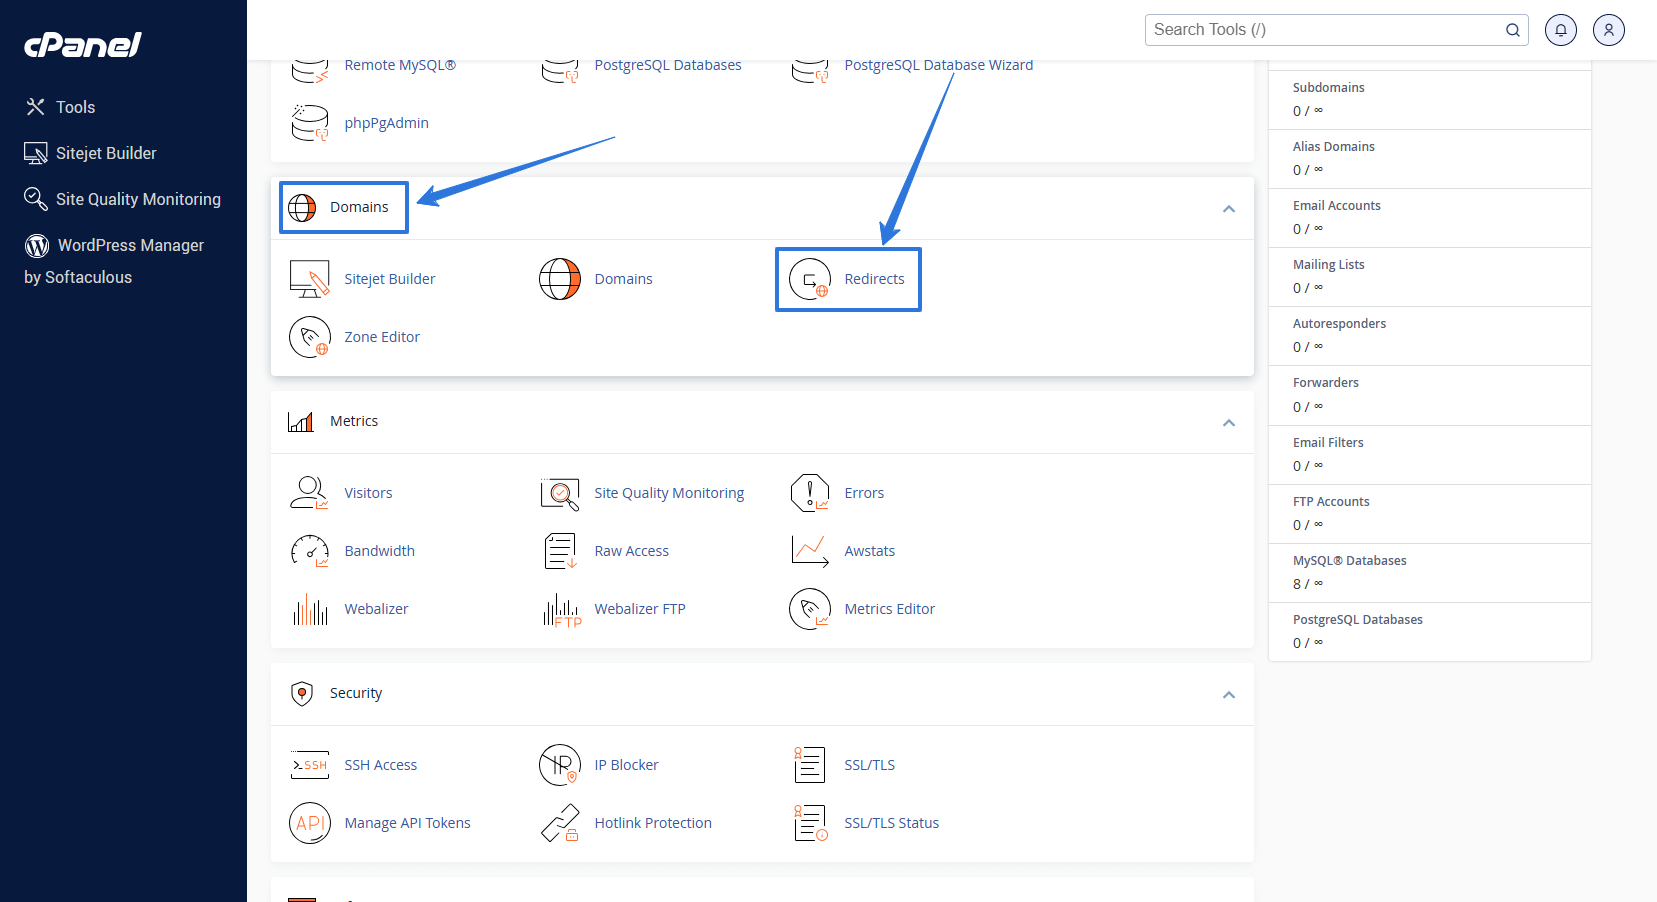
3. The Redirects page should be visible now.
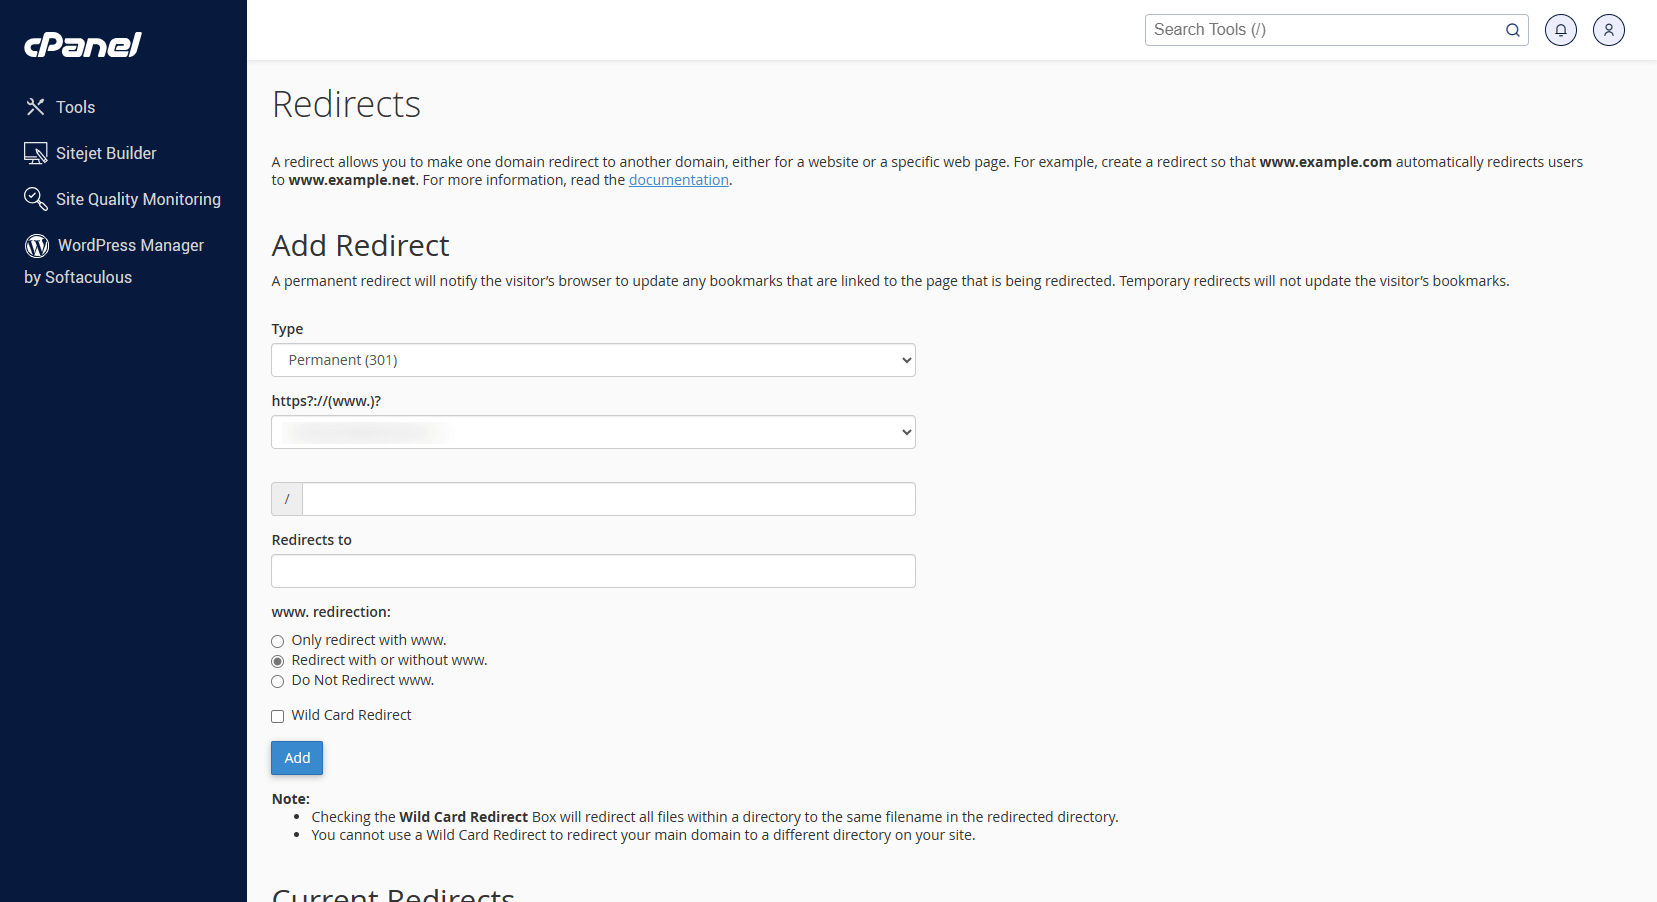
On that page, fill in the information for your redirect like this:
- Type: Select Permanent (301).
- Https?://(www.)?: Select your preferred domain.
- /: Enter the end of the original URL. This is the page you wish to deflect traffic from. For instance, if the URL is “https://example.com/old-content,” you would enter “old-content.”
- Redirects to: Enter the full URL of the new destination.
4. Select the option to Redirect with or without www. and add the new redirect.
Your 301 redirect should now be live.
3. Write a PHP script
PHP is a server-side programming language and stands for PHP: Hypertext Preprocessor. Developers use it to build dynamic websites. Since it runs on the server, PHP offers secure 301 redirect implementations.
Here’s how to create a 301 redirect in WordPress using PHP:
1. Open the File manager of the website you wish to manage. Create a new file and name it “redirects.php,” as shown in the image below.

2. After creating the file, right-click on it and select Edit. A file editor will launch. Copy and paste the following code into the editor:
<?php
// OldContent.php
header(“HTTP/1.1 301 Moved Permanently”);
header(“Location: https://www.example.com/new-content/”);
exit();
?>
Change “OldContent” to the file name for the page you’re updating and “https://www.example.com/new-content/” to the new URL you wish to use. Save the changes and close the editor.

3. To make sure everything’s working, go to your browser’s address bar, type in the old URL and press Enter. You’ll be redirected to the new URL you provided in the header function.
You can also add this header function at the beginning of any PHP file you want to redirect instead of making a new file. Remember to ensure the code takes the first line at the top.
4. Use a WordPress plugin
If none of the methods above tickle your fancy,
there are plenty of plugins you can use to create a 301 redirect in WordPress.
We’ll illustrate this method using the Redirection WordPress plugin because it’s open-source, free and actively maintained.
However, WordPress SEO plugins like Yoast SEO and AIOSEO also have a redirect manager to help with this process.
Here’s how you can create a 301 redirect in WordPress using the Redirection plugin.
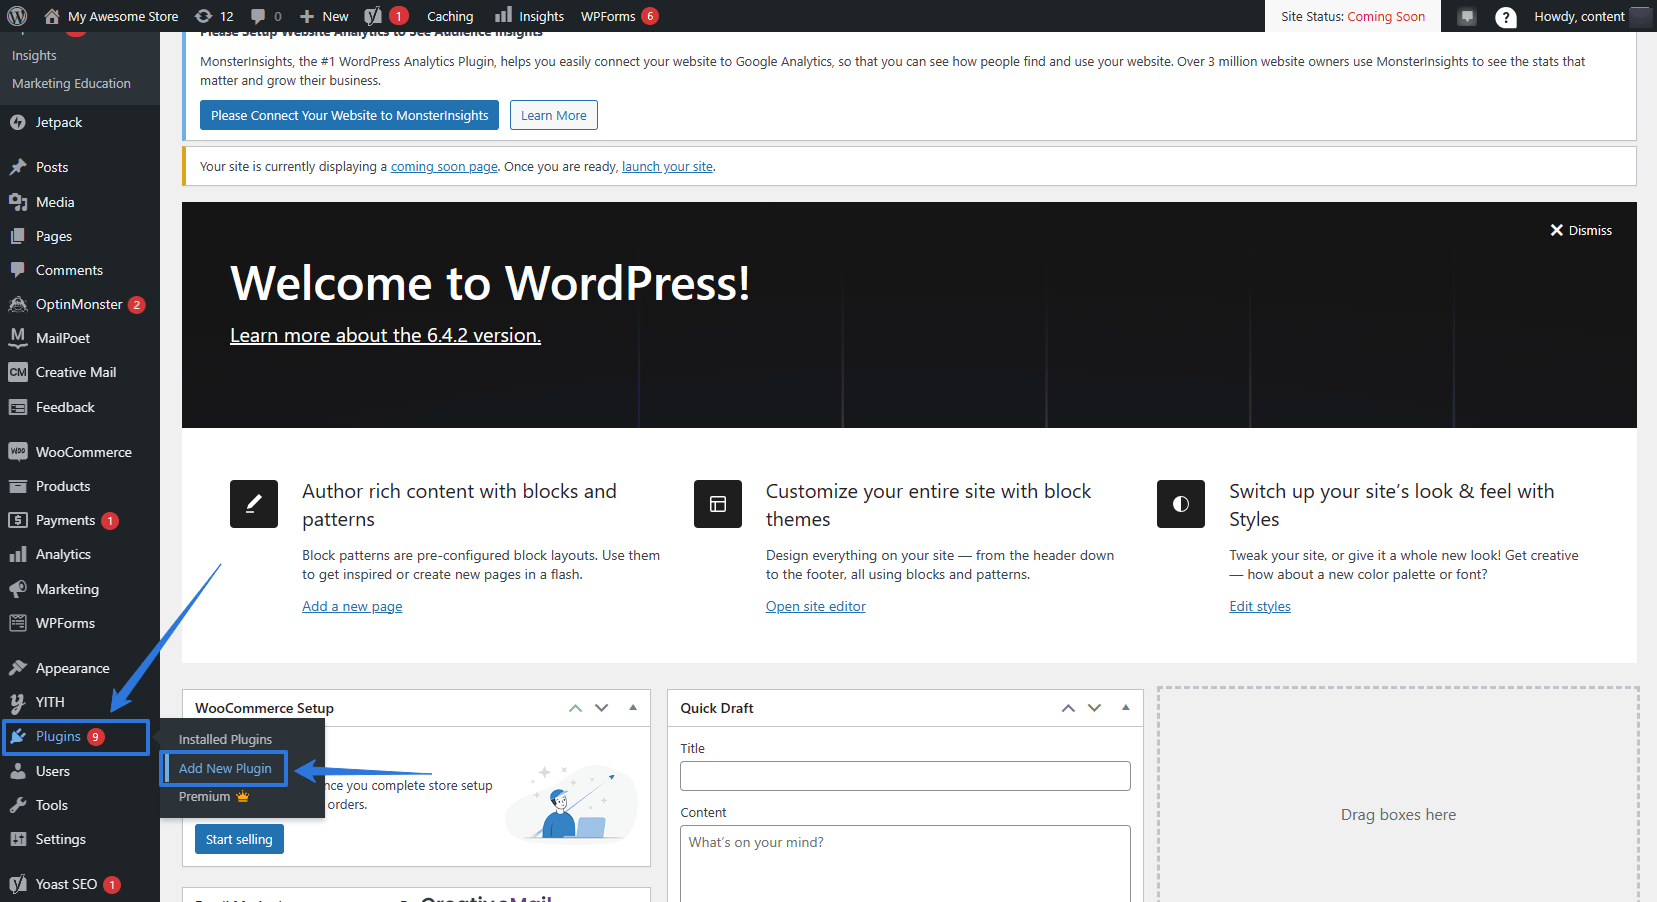
1. Sign in to your WordPress dashboard. Navigate to Plugins > Add new plugin.
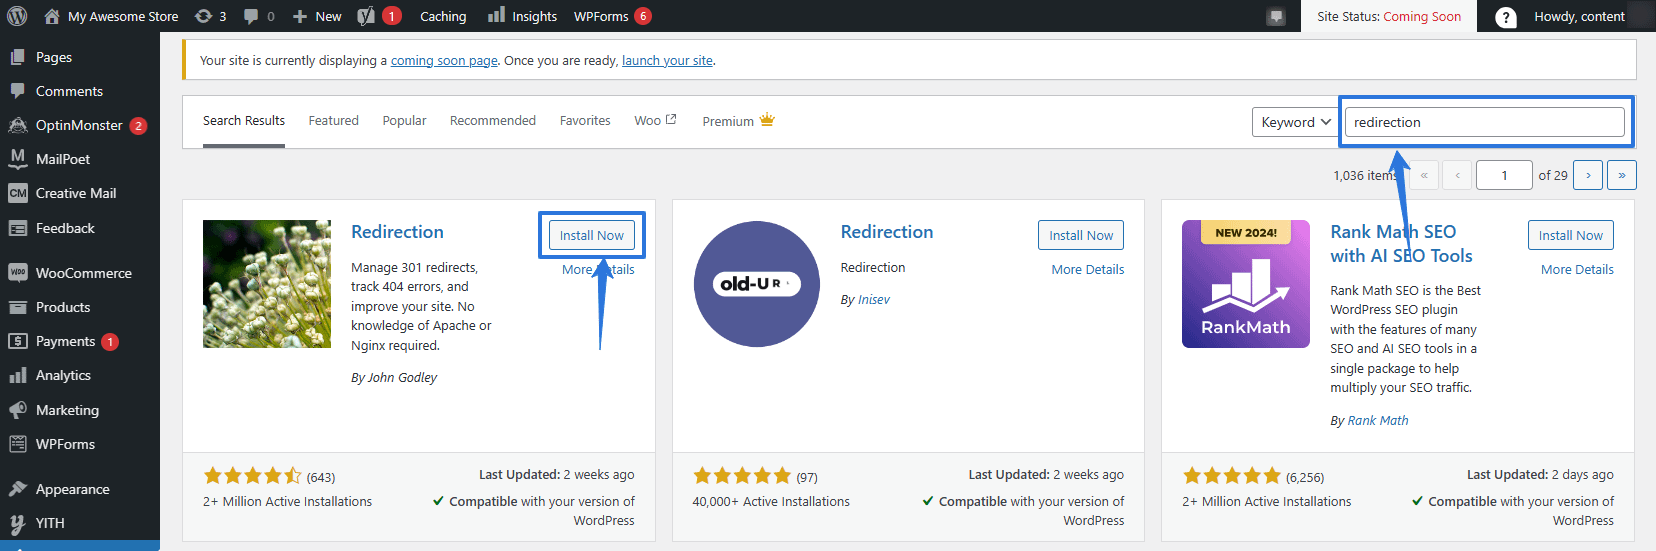
2. In the search field, type “redirection.” The Redirection plugin will appear in the results. Install and activate it.
3. From your WordPress dashboard, navigate to Tools > Redirection. The setup wizard will help you configure Redirection. When setup is complete, you’ll see the page below. Click on the cog wheel to display the advanced options.
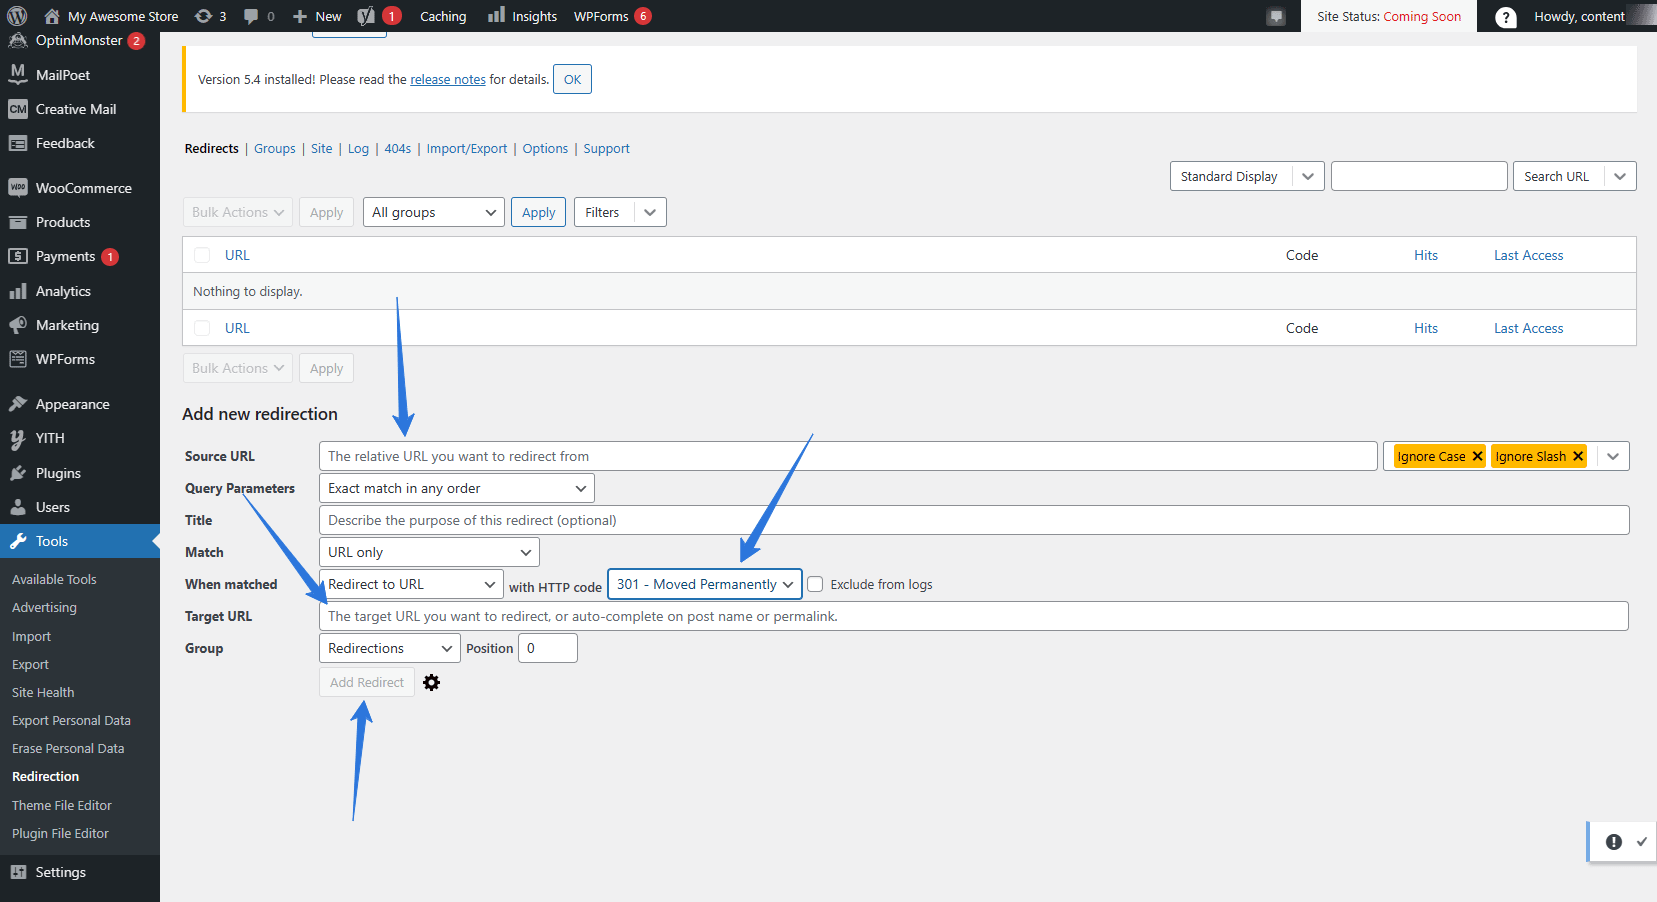
4. Fill in the source URL and target URL, then select 301 – moved permanently from the dropdown as the HTTP code. Click Add redirect to save. Repeat this process for all the WordPress redirects you need.
Final thoughts: 4 ways to create a 301 redirect in WordPress
Based on your technical knowledge, you can choose which of the above redirection techniques you’re most comfortable with. Regardless of which method you choose, the redirects will work on any WordPress website and can even help with your website’s performance.
To optimize your website further, Bluehost offers several WordPress web hosting plans. We’ll give you a free domain for your first year, offer automated WordPress updates and include a content delivery network (CDN) to boost your loading speed. Contact us today to learn more.
The post 301 Redirects in WordPress: 4 Ways To Retain All Your Traffic and SEO Value appeared first on Bluehost Blog.
[ad_2]
Article link