Do you want to add an event calendar to your WordPress website?
A calendar is a great way to share in-person and virtual events with your visitors. You can use one to promote your upcoming events, get more people to attend, and help with brand awareness.
In this article, we’ll show you how to easily create a simple event calendar in WordPress with Sugar Calendar.
Why Create a Simple Event Calendar For Your WordPress Website?
By adding a calendar in WordPress, you can show upcoming events to your visitors.
This makes it easy for people to learn about your upcoming webinars, virtual retreats, online sermons, coaching calls, and more. In this way, a calendar can promote your events and encourage more people to attend.
If you have a membership website or a forum, then you can even accept user-submitted events. This is a great way to build a community, attract new visitors, and keep your calendar updated with the latest events. You’ll also save time since you don’t need to research upcoming events and add them to the calendar yourself.
With that being said, let’s see how you can add a simple event calendar to your site.
How to Create a Simple Event Calendar in WordPress
The easiest way to add an event calendar to WordPress is by using Sugar Calendar. It is the best WordPress calendar plugin and has everything you need to create multiple calendars, set start and end times for your events, sync with Google Calendar, and more.
The first thing you need to do is install and activate the Sugar Calendar plugin. For more details, see our step-by-step guide on how to install a WordPress plugin.
Upon activation, head over to the Calendar » Settings page. Here, you can enter your license key into the ‘License Key’ field.
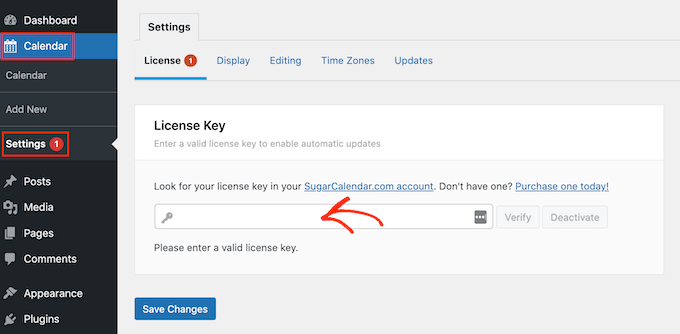
You’ll find this key by logging into your Sugar Calendar account. It’s also in the email you got when you purchased Sugar Calendar.
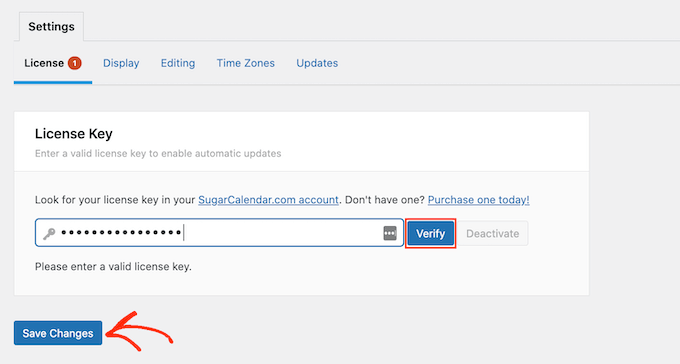
After that, click on the ‘Verify’ button to check that your license key is valid. Finally, you can click on ‘Save Changes’ to store your settings.
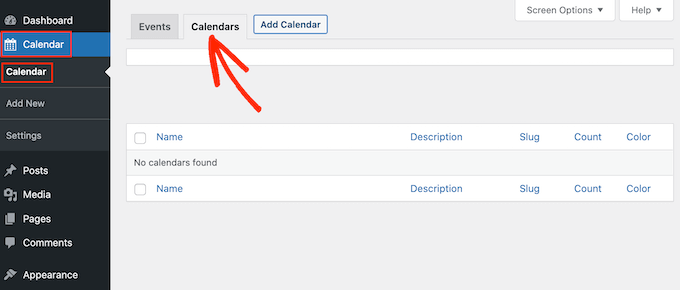
Once you’ve done that, you’re ready to create a calendar by going to Calendar » Calender.
Here, click on the ‘Calendars’ tab.
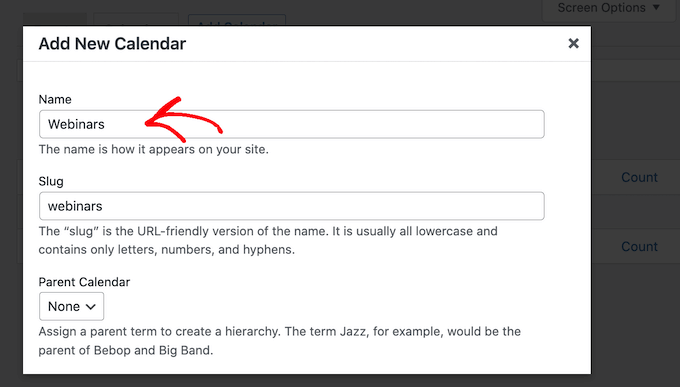
You can now click on the ‘Add Calendar’ button.
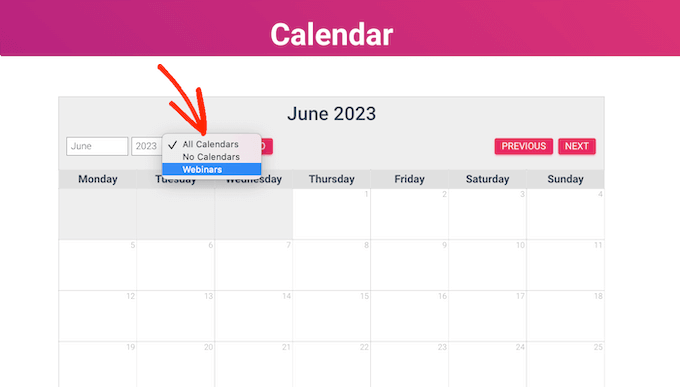
This opens a popup where you can type a title into the ‘Name’ field. Sugar Calendar lets you create multiple calendars, but it only adds a single calendar view to your site. Visitors can switch between the different calendar views using a dropdown menu.
That being said, the ‘Name’ should help visitors tell the difference between the various calendars.
Similar to child pages, you can arrange calendars in parent-child relationships.
Children appear beneath their parents in the WordPress dashboard, so this can be a useful way to organize your calendars. This is particularly true if you have lots of different calendars.
All calendars are parent calendars by default. To create a child calendar, you’ll need to open the ‘Parent’ dropdown and then choose the calendar that you want to use as the parent.
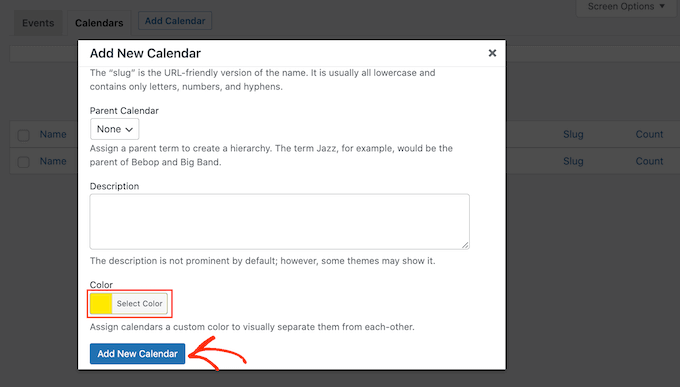
Next, you can add an optional description. Depending on your WordPress theme, this may appear next to the calendar on your website, but not all themes show the calendar description. If you do add a description, then always check that it shows up on your WordPress website.
Finally, you may want to add a color that will appear next to the calendar in your WordPress dashboard. This color-coding can help you group related calendars together, or easily identify a particular calendar.
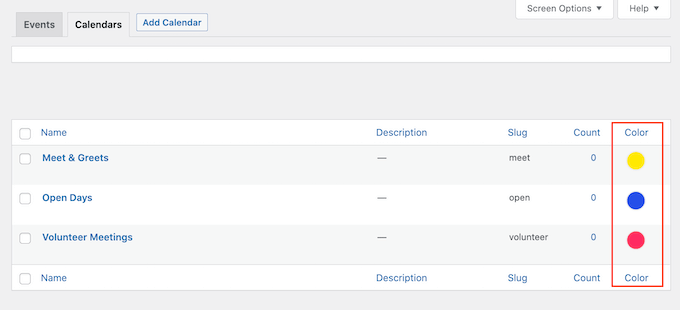
To add a color, simply click on the ‘Select Color’ switch and then make your selection using the controls that appear.
When you’re happy with the information you’ve entered, click on ‘Add New Calendar’ to go ahead and create your first Sugar Calendar.
You can create multiple calendars simply by repeating the same process described above.
Adding Events in Sugar Calendar
Once you’ve created a calendar, you’re ready to add events to that calendar.
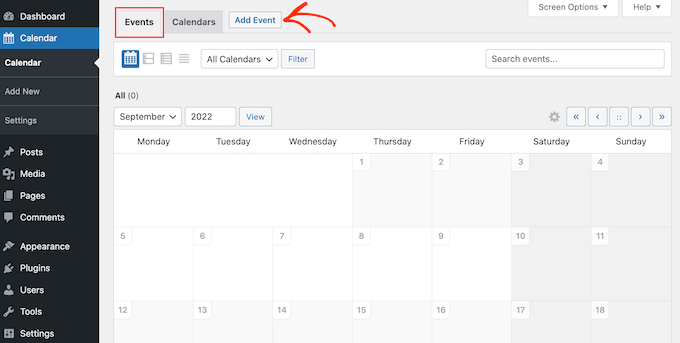
To start, select the ‘Events’ tab and then click on the ‘Add Event’ button.
You can now add all the information about your event, such as date and time, duration, and whether or not it is recurring.
First, you’ll want to go ahead and give the event a name.
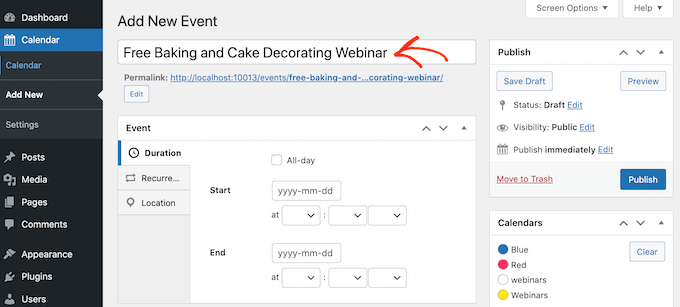
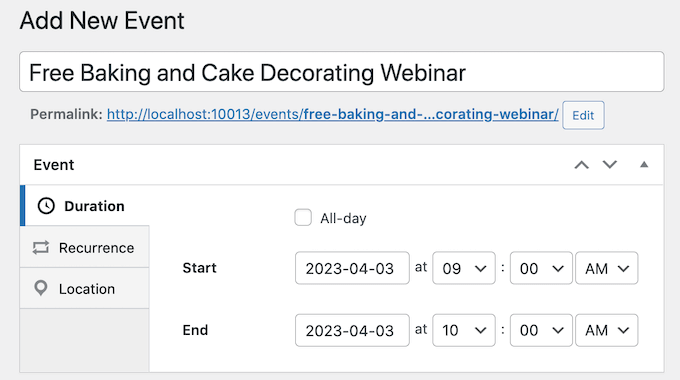
Then, add a start time and end date. If the event will last all day, then you can simply check the ‘All-day’ box.
Another option is to set a start and end time, as you can see in the following image.
By default, Sugar Calendar creates all events as one-time events. However, some events are recurring. For example, you might run a webinar every Monday morning or have a monthly meetup for all the volunteers at your nonprofit organization.
To create a recurring event, simply select the ‘Recurrence’ tab, and then choose an option from the ‘Repeat’ dropdown, such as Daily, Weekly, or Monthly.
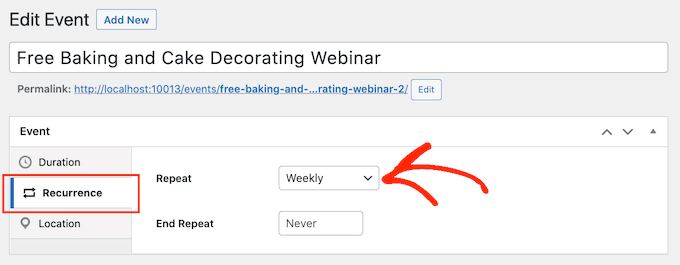
You can also set an optional ‘End Repeat’ date, which is when the event stops recurring. For example, you might only plan to run webinars until the end of the year.
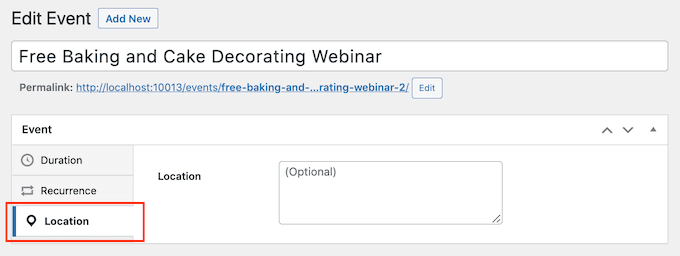
If you’re organizing an in-person event, then you can also select the ‘Location’ tab and type in where this event will take place.
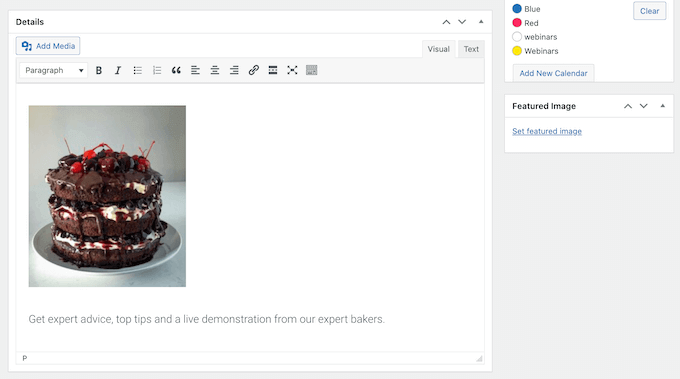
Next, enter some information about the event in the ‘Details’ box.
This works exactly the same as the WordPress classic editor so you can add images, videos, and formatting.
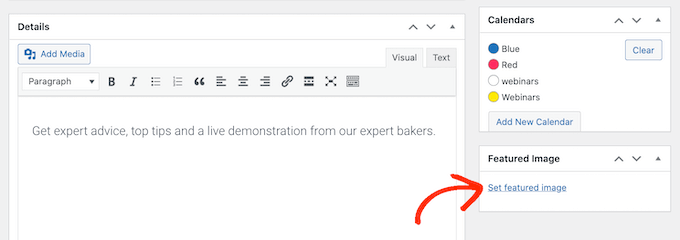
You can also add a featured image, which will appear on the event’s page. This can make the page more engaging and may also be used in search results and on social media news feeds.
To add a featured image, simply click on ‘Set featured image’ and then either choose an image from the media library or upload a new file.
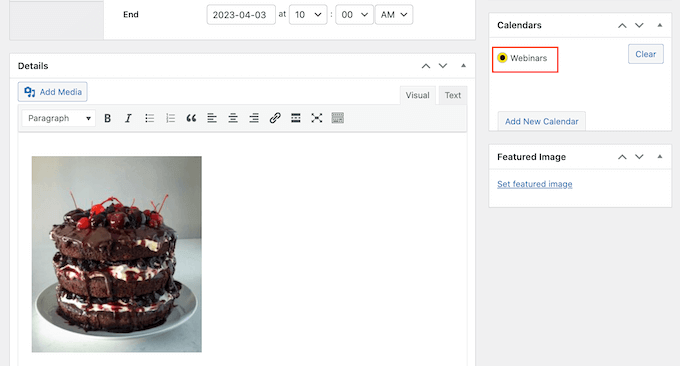
In the ‘Calendars’ section, find the calendar where you want to add this event.
You can then click to select its radio button.
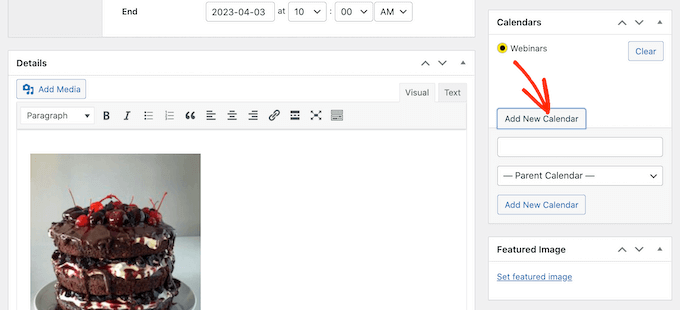
You can also create a new calendar in this section, simply by clicking on the ‘Add New Calendar’ button.
This adds some settings where you can give the new calendar a name and assign it an optional parent calendar.
Once you’ve entered all the information, just click on the ‘Publish’ button.
You can repeat this process to add more events to the calendar.
Putting Your Events Calendar on Your Website
You can add a calendar to any post or page using shortcode. If you’ve created multiple calendars then visitors can switch between these different calendars using a dropdown.
We’ll add the calendar to a new WordPress page, but the steps will be similar no matter where you’re adding the calendar.
First, go to Pages » Add New in your admin panel. If you want to add it to an existing page, simply click ‘Edit’ under its name on Pages » All Pages.
Then, give your page a title and add any categories and tags that you want to use.
You can then click on the ‘+’ icon to create a new block and type in ‘Shortcode.’ When the right block appears, click on it to add it to the page.
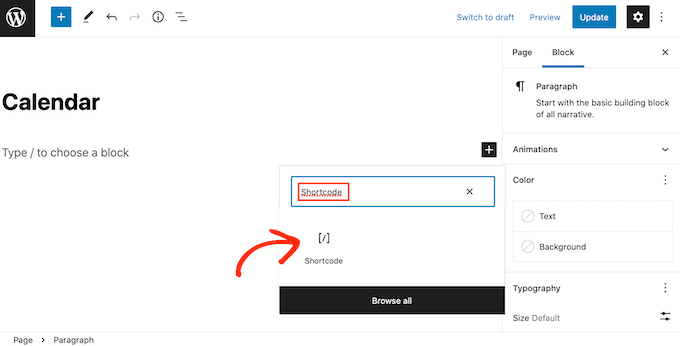
Next, copy the shortcode[sc_events_calendar] into the shortcode block. For more details, please see our guide on how to add a shortcode in WordPress.
You can now publish or update the page to make the calendar live on your website.
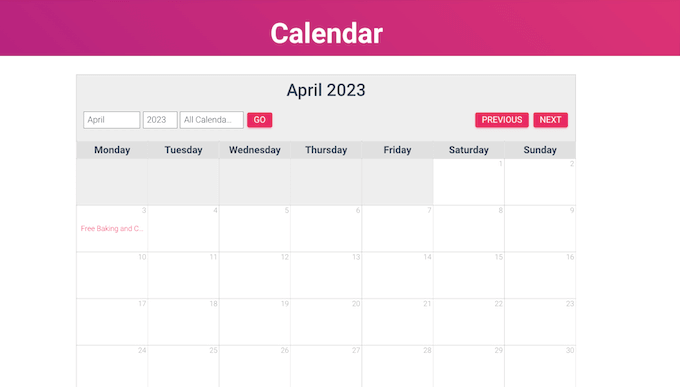
To see more information about an event in the calendar, simply click on it.
This will open the event’s page showing the time, date, and any other details.

Sugar Calendar also has a widget that you can add to any widget-ready area of your WordPress theme. This is an easy way to add a calendar to every page of your website or WordPress blog.
The widget also lets you set a default calendar, which will be selected in the dropdown menu. This gives you more control over which events visitors see.
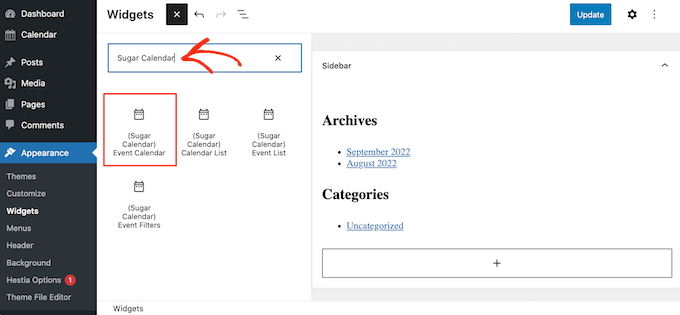
To add a widget in WordPress, simply go to Appearance » Widgets. Here, click on the blue ‘+’ button.
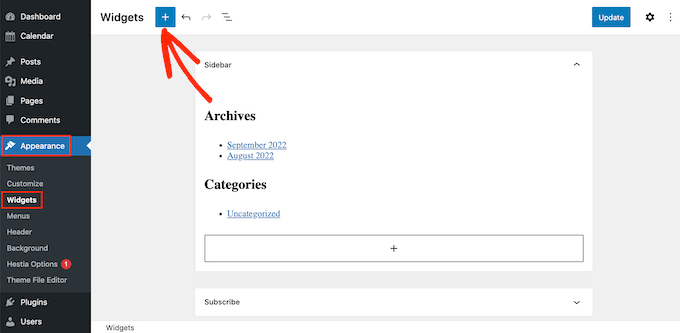
You can then type in ‘Sugar Calendar.’
There are a few different Sugar Calendar widgets, so make sure you select the ‘Event Calendar’ widget.
Now simply drag and drop the widget onto the area where you want to show the calendar.
At this point, you can add an optional title and change the size of the calendar.
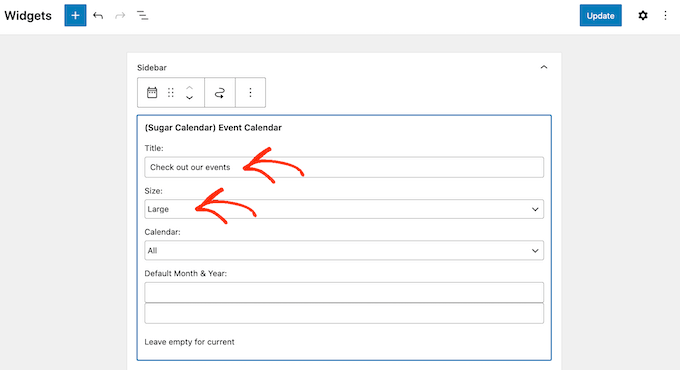
To change the default calendar, open the ‘Calendar’ dropdown and then choose an option from the list.
By default, Sugar Calendar will show the current month when the page loads, but you may prefer to show a different month instead. To make this change, simply type a new date into the ‘Default Month & Year’ field.
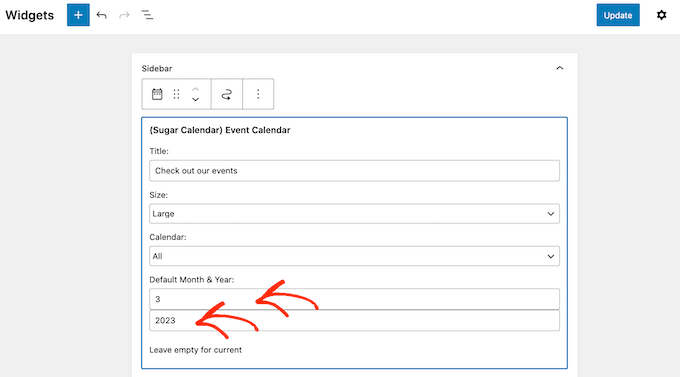
Once you’re finished, don’t forget to click on the ‘Update’ button. Your Sugar Calendar widget will now show up on your site!
We hope this article helped you learn how to create a simple event calendar with Sugar Calendar. You might also like our article on the best email marketing services and best push notification software, so you can keep your users updated about new events and activities.
If you liked this article, then please subscribe to our YouTube Channel for WordPress video tutorials. You can also find us on Twitter and Facebook.
The post How to Create a Simple Event Calendar with Sugar Calendar first appeared on WPBeginner.
